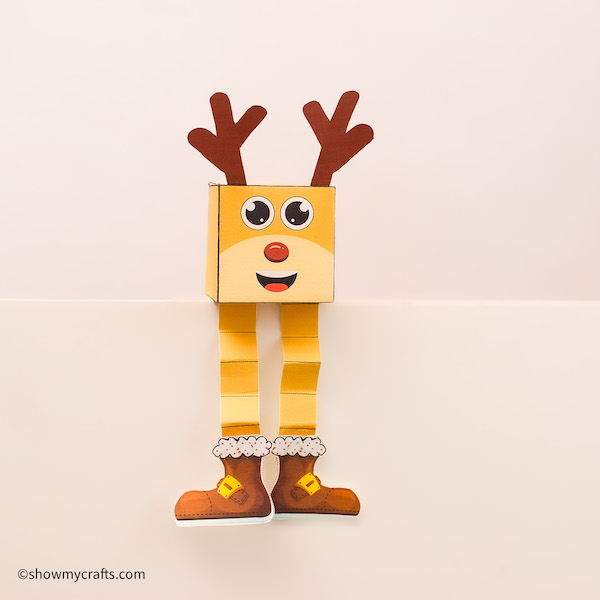
Rudolph Reindeer Box Craft

Rudolph Reindeer Box Template
Get this printable template below and you are on your way to making your very own Rudolph Reindeer box craft.
This template has the main outline to be cut out as well as the legs, shoes and antlers of the reindeer.
Don’t forget to embellish even further after making your reindeer craft.
How to make Rudolph Reindeer Box Craft
Materials needed
- Plain white card stock paper
- Scissors
- Glue stick
- Printable template
Instructions
Print out the Rudolph box template on the Cardstock paper.
The complete template comes in two pages.
Using a pair of scissors, cut out the box template along the thick black lines.
Also cut out the the two strips, two shoes and two antlers.
This is the time for the kids to exercise some cutting skills.
Some kids may need supervision and you may need to do the cutting for the younger kids.
With the white side up, start folding the all edges as pictured.
Make sure the crease is along the black lines.
Once all the edges have been folded, now its time fold along the inside lines.
Your box should now start to take shape.
Grab your gluestick.
Apply some glue to the folded edges and glue them to the corresponding side.
Join all the sides of the templates together to form a complete box.
To make the legs of your Rudolph Reindeer Box Craft, fold the previously cut strips along the dotted lines.
Fold to make a zig zag shape.
Glue the cut out shoes to one side of the folded legs.
Now glue the legs to the head of the reindeer.
This Rudolph craft is almost complete.
Now take the antlers and fold where it is indicated on the cut out pieces.
This is where the brown colour meets the white colour on the antlers.
Now glue the antlers to the top of your reindeer.
Try not to glue the antlers too close to each other.
Now your Rudolph Reindeer christmas craft is complete.