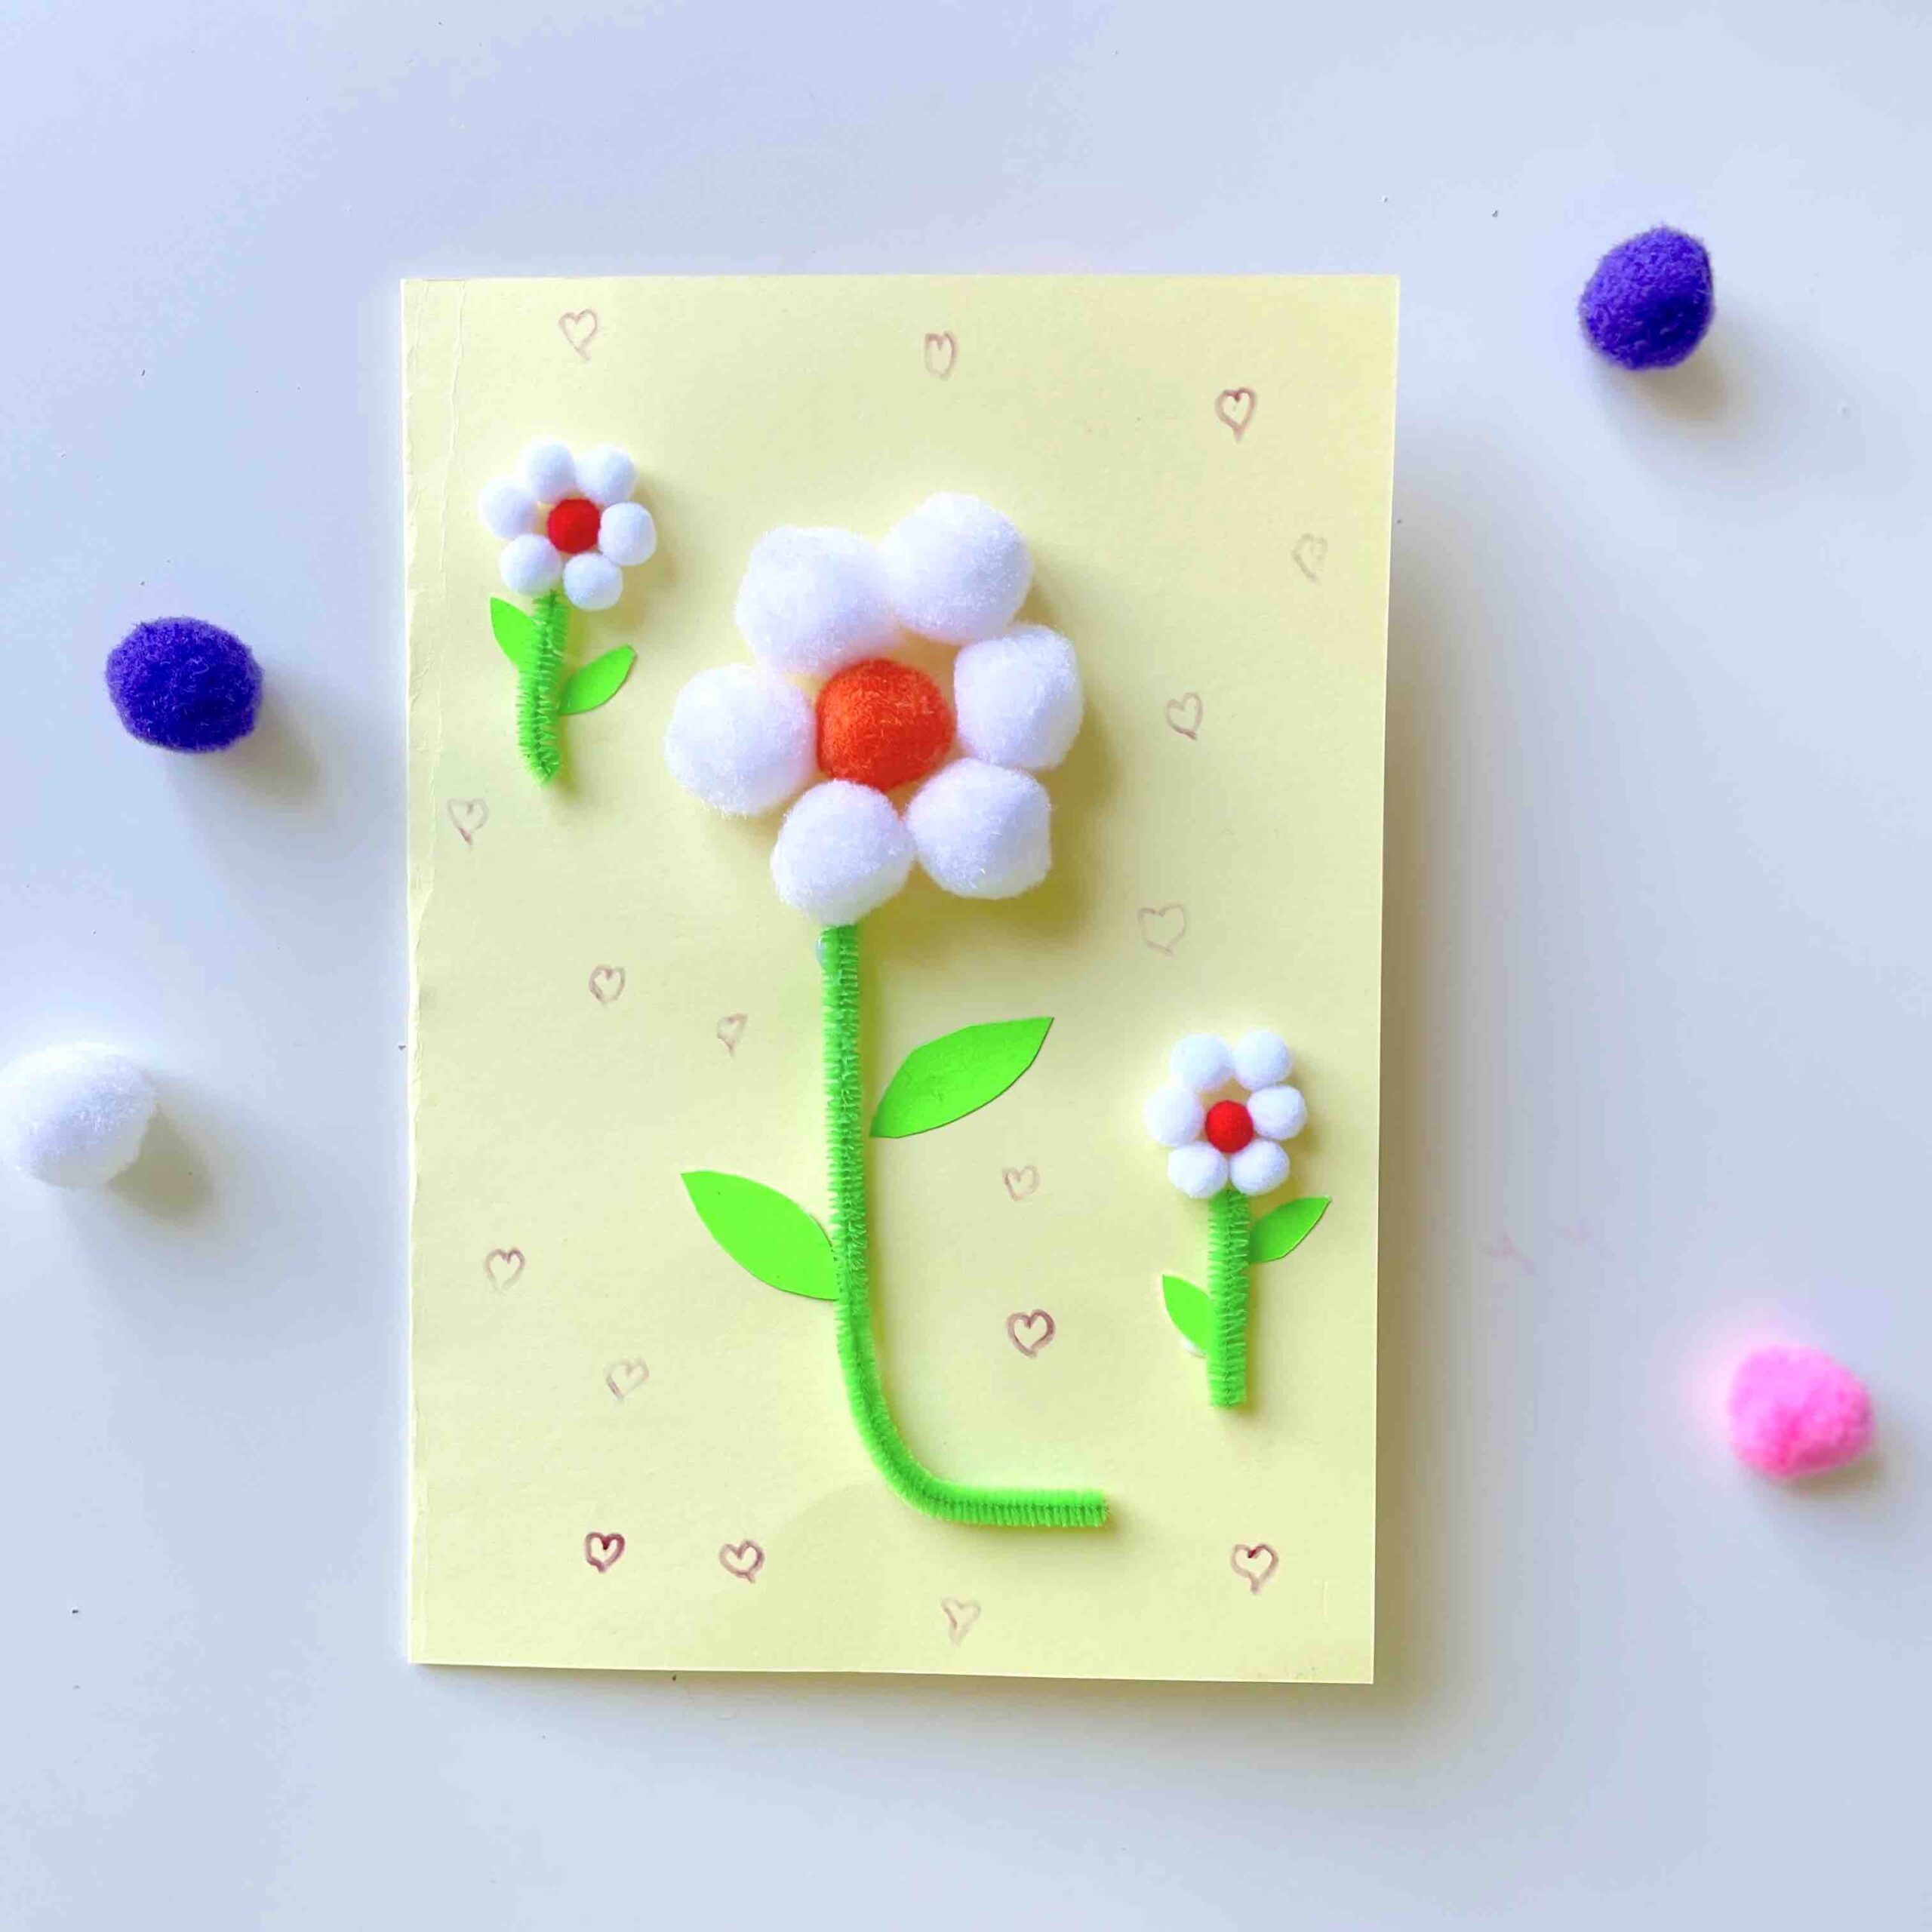
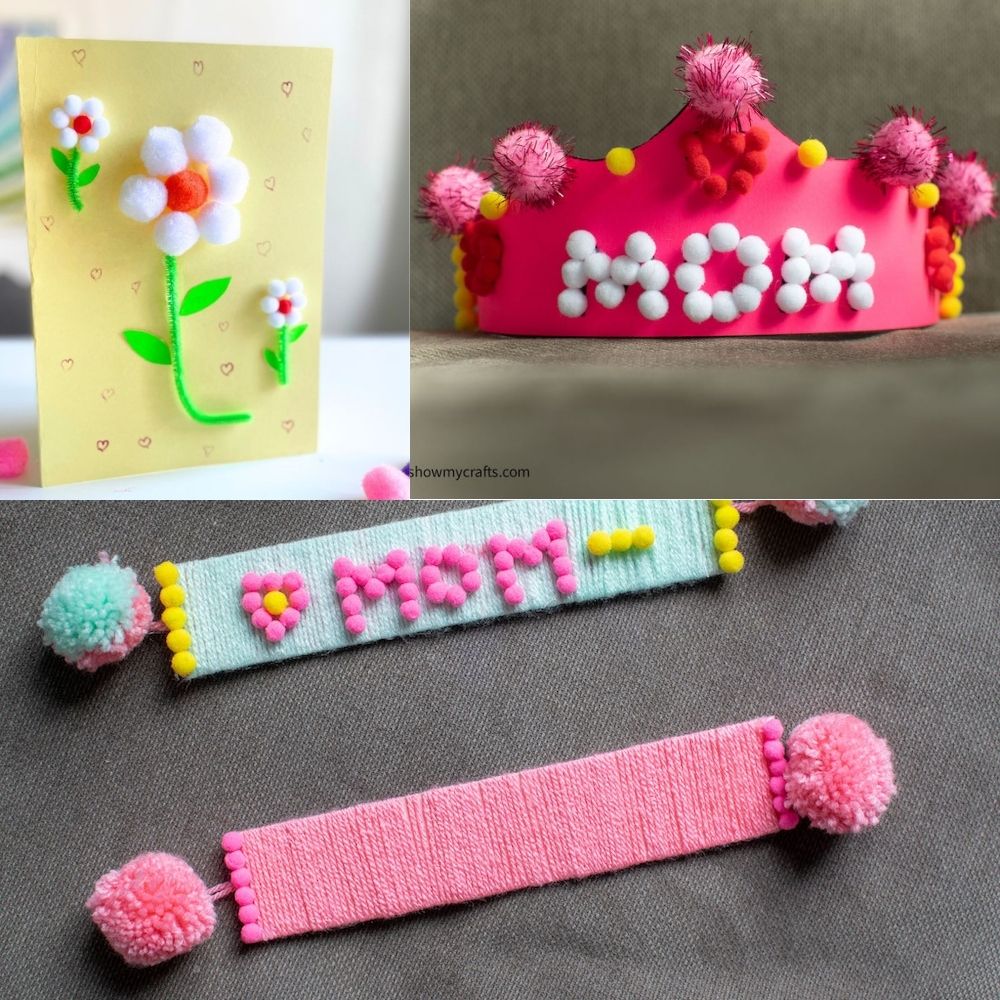
Pom pom mom tiara

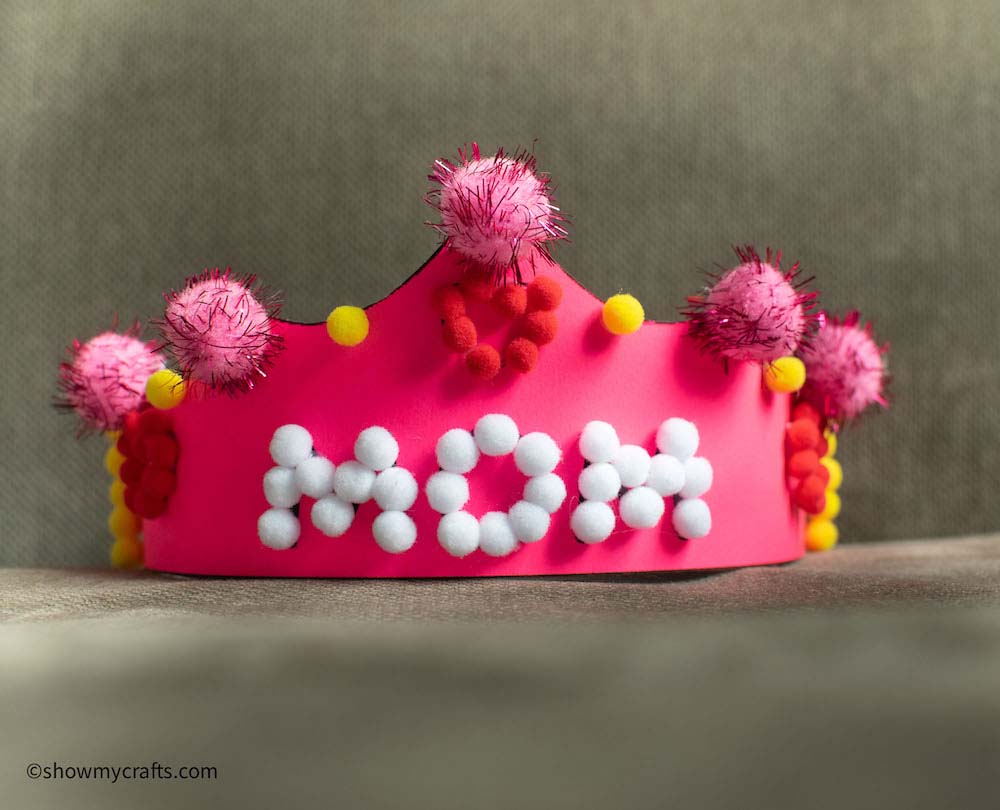
How to Make a Pom Pom Mom Tiara with Printable Templates

This is a cute Pom pom craft kids will love Whether it’s for a birthday party, a costume event, or in this case, a tiara specially made for mom for Mother’s Day.

In this tutorial, we’ll guide you through the process of making your very own pom pom mom tiara using our free printable template.

Get ready to unleash your inner craftiness and create a unique headpiece that will turn heads and make mom feel like a queen!

Making a pom pom tiara for mom or in fact anyone is fun and an easy DIY project that requires just a few simple materials, including printable templates, and some creativity.

Materials Needed

Before we dive into the steps, let’s gather all the materials you’ll need to create your pom pom mom tiara using printable templates:

Printable tiara template
Cardstock or thick paper
Scissors
Pom poms ( different colours and sizes)
Glue gun

There are two versions of the free printable tiara templates

You can make a Mother’s Day version or a plain tiara to design and embellish as you wish

Printing and Preparing the Templates

To start, download and print the pom pom mom tiara template on cardstock or thick paper.

Make sure to adjust the printer settings to ensure accurate sizing for A4 paper.

Once printed, carefully cut out the templates along the outer edges.

Attaching Pom Poms to the Tiara

It’s time to attach them to the base of your tiara.

Heat up your glue gun or prepare your fabric glue.

Apply a small amount of glue onto the base of a pom pom and press it firmly onto the tiara base, holding it in place for a few seconds to ensure it sticks securely.

Feel free to arrange the pom poms in any pattern or design that pleases you. 

To make your pom pom mom tiara even more dazzling, you can add additional decorations and embellishments. 

Use the printable template to cut out small shapes like stars, hearts, or flowers from colored paper or cardstock.

Glue these shapes onto the tiara base, around the pom poms, to create a playful and festive look.

You can also add ribbons, beads, sequins, or any other embellishments that you like.

Apply glue to the desired area on the tiara and press the embellishment firmly onto it.

Glue pom poms to the MOM letters and the hearts

Add some more pom poms to the top and edges of the tiara

Remember, the goal is to make your tiara unique and reflective of your personal style.

Let your creativity flow and experiment with different combinations of colors and decorations.

Now that you’ve completed the basic structure of your pom pom mom tiara, it’s time to glue the bands together.

Adjust the bands for the size of the head so it sits properly when worn.

Then glue the bands to the right side and the left side of the Tiara.

Now glue the ends of the bands together to complete the tiara

Attach small photographs of your loved ones to the tiara, creating a sentimental touch.

Write uplifting or inspiring messages on small pieces of paper and tuck them into the pom poms.

Glue on small trinkets or charms that hold special meaning to you.

Integrate elements that represent your hobbies or interests, such as tiny figurines or symbols.

These personal touches will make your tiara not only a fun accessory but also a meaningful keepsake.

Tips for a Perfect Pom Pom Mom Tiara

To ensure the best results and a tiara that you’ll love, keep these tips in mind:

  1. Choose colors that complement each other and your outfit.
  2. Take your time and be patient while attaching the pom poms and decorations to the tiara.
  3. A steady hand will ensure a neat and pretty looking tiara.
  4. Use different sizes and textures of pom poms for your tiara.
  5. Allow the glue to dry completely before wearing the tiara to prevent any mishaps.
  6. Remember, crafting is all about embracing your own style and having fun along the way. Let your creativity shine through and enjoy the process!

Congratulations on creating your very own pom pom mom tiara!

With the help of our free printable template, you’ve crafted a unique and playful tiara for mom that will make her feel special on Mother’s Day .

Remember, there are endless possibilities for customization and personalization. Feel free to experiment with different colors, shapes, and decorations to make each tiara a reflection of your individual style and personality.

Print template here

Pom pom mom Tiara template

Plain Tiara template

Some Pom pom crafts you may like

Pom pom bookmarks

Pom pom flower card

Mothers day pom pom bookmarks

These Pom pom bookmarks are very pretty, eye-catching and very easy to make.

For the older kids who love arts and crafts, these cute bookmarks can be to used personally or given as a gift.

They also make easy mothers day crafts to make and give to mom if you are stuck for ideas.

Mother’s Day Pom pom Bookmark

All the supplies are very inexpensive and very to easy to buy. You can either buy the large poms poms or have even more fun by making your own.

Here are the different ways to make your own pom poms

What you will need to make your Mother’s Day Pom pom bookmark

  • Wool/yarn
  • Strip of thick stock card paper or cardboard
  • Scissors
  • Mini pom poms
  • Large pom poms
  • Glue gun
  • Marker
  • Pom pom maker ( if you don’t want to buy the large pom poms)

Add a some glue to the top of the paper.

Pull the tip of the yarn and lay it on the glue to stick it in place.

Then start to cover the paper by winding the yarn on.

As you  roll on the yarn, use your finger to push them close so there are no visible spaces

Add some a dot or two of glue when you are half way and then continue.

This will ensure the yarn is firmly attached to the paper.

Your bookmark is shaping up nicely.

Now that it is completely covered in yarn, you can now personalise or decorate it as you want.

You bookmaker can be decorated with craft tones or gems but tiny fluffy Pom poms are ideal because they won’t make an indentation on the pages of books.

As this is a Mother’s Day bookmark, use a marker to trace a shape or in this case a message.

This will help guide where to apply the glue.

Apply the glue to the design and then start to glue the mini pom poms to the bookmark.

Do not apply the glue all at once to prevent it from drying before the pom poms are attached.

Mini pom poms completely attached. Now add some glue to both ends of the bookmark and decorate with some pom poms.

Play around with different shapes and colours to make your bookmark eye-catching and colourful.

If you are making your own large pom pom, once you have tied the two sides of yarn together leave the ends slightly long to make string.

Turn the the bookmark upside down and simply glue to both ends of the bookmark

Your Pom pom bookmark is complete.

Now you can give this as a thoughtful Mother’s Day gift.

You can also personalise with your friend’s name using their favourite colours and give as a birthday gift

Have fun.

Here are some Mother’s Day crafts you may like

Mothers day heart card

Mothers day photo card

Mothers day flower card

Mother’s Day flower card

This mother’s day flower card made with pom poms  is a great craft kids can make as a gift or token for Mother’s Day.

The kids can wish happy Mother’s Day to mum while also having fun being creative.

This pom pom craft can be made for Mother’s Day with simple supplies. To make one, you will need the following supplies with the following instructions.

How to make Mother’s Day Flower Card

You will need

  • Pom poms (different colours and sizes)
  • Pipe cleaner (Green colour)
  • Scissors
  • Glue
  • Construction paper (Any colour)
  • Marker
  • Green paper

Create the base of the card by folding a piece of coloured construction paper in half.

Using the glue, arrange the pom poms in a circle. Make sure it is firmly in the centre to make space for the other flowers.

Cut the pipe cleaner using scissors to an appropriate length. Then glue to the bottom of the flower.

Repeat the above step with smaller pom poms to make smaller flowers

Place the flowers at the top and bottom of the card

Use the marker to draw small hearts all over the card.

Try to use a different coloured marker

Using a marker, write in the Happy Mother’s Day message on the inside of the card

Then add dots as a simple and easy decoration.

Have fun.

Mother’s Day Crafts you can also try

Mother’s Day Heart card

Flower photo card

Craft stick flower 

Easy Pom pom crafts for kids

Easy Pom Pom Crafts for Kids

Crafting is a wonderful way to engage children and encourage their creativity.

It helps develop their motor skills, boosts their imagination, and allows them to express themselves.

One of the most versatile and fun craft materials for kids is pom poms. In this article, we will explore easy pom pom crafts that your kids will enjoy creating.

Introduction

Crafting with pom poms provides a fantastic opportunity for kids to explore their artistic side while having a great time.

These fluffy and colorful balls can be transformed into various adorable creatures, objects, and decorations.

Let’s dive into some exciting pom pom crafts that your kids will find easy and enjoyable to make.

What are Pom Poms?

Pom poms are small, decorative balls made from yarn or other materials.

They are commonly used in crafts, DIY projects, and even as embellishments on clothing and accessories.

Pom poms come in different sizes, colors, and textures, allowing for endless possibilities when it comes to crafting.

Benefits of Engaging Kids in Crafts

Craft activities have numerous benefits for children. They not only provide entertainment but also contribute to their overall development. When kids engage in crafts, they:

  • Enhance their fine motor skills: Crafting involves using small materials and tools, which helps improve hand-eye coordination and fine motor control.
  • Boost their creativity: Crafts allow children to explore their imagination, think creatively, and come up with unique ideas.
  • Develop problem-solving skills: Craft projects often require children to find solutions to design challenges, promoting critical thinking and problem-solving abilities.
  • Learn patience and perseverance: Completing a craft project requires patience and the willingness to keep trying until it is finished, teaching children the value of perseverance.
  • Express themselves: Crafts offer a medium for kids to express their emotions, ideas, and personal style.
  • Gain a sense of accomplishment: Finishing a craft project gives children a sense of achievement, boosting their self-confidence and self-esteem.

Easy Pom Pom Crafts for Kids

Now, let’s explore some easy and delightful pom pom crafts that your kids can create with just a few simple materials.

Pom pom bookmarks

Crafting your very own pom-pom bookmarks is a breeze. Are you ready to add a sprinkle of fun and color to your reading adventures?

Then get ready to dive into the whimsical world of pom-pom bookmark crafts! These adorable creations will not only make your reading sessions extra special but also showcase your creative flair.

Pom pom flower card

Get crafting with this pom pom flower card for kids!

Let your little ones unleash their creative superpowers as they design personalized cards that are perfect Mother’s Day, Father’s Day or even birthdays.

Get ready for a pom pom-tastic adventure that’s as fun to make as it is to give!

Pom pom christmas tree

Dive into the joyous world of crafting with our Pom Pom Christmas Tree! This is fun for kids to make.

Print the free template to make this fun christmas project and of course decorate with pom poms

Pom pom mom tiara

Make this Pom Pom Mom Tiara using our free printable tiara templates.

Create your unique headpiece adorned with colorful pom poms and personalized embellishments.

Craft your own tiara and or make one for mom and let her inner queen shine!

Folded paper christmas tree

Folded Paper Christmas Tree

A folded paper Christmas tree is a great festive craft idea to make with the kids.

It is very easy, straightforward and the children can make and decorate as they please.

You can use as christmas decoration when finished by hanging on your Christmas tree, on the wall or even stand it on your mantlepiece.

This could make a great preschool Christmas craft by printing the free template on white paper and then have the kids colour their own Christmas tree before cutting.

Making this simple Christmas tree with paper will help develop further the fine motor skills  and general creative crafting skills of the kids.

To make a simple Accordion paper Christmas tree

Material needed

  • Free Printable template. Download below.
  • Scissors
  • Paper straw
  • Hole punch
  • Glue
  • A4 Paper (white or green)
  • Optional – Mini pom moms, craft gem stones, 

Instructions 

Print on the normal paper you use to print on documents.

If the templates will be coloured in, make sure to print on white paper. The colouring is to be done before cutting.

Cut out your template.

Begin from the base and fold away from you. Fold approximately 1/2 an inch on either side.

Turn the paper over repeat until you get to the top.

Take a hole punch and punch through all the folds.

This might not be possible if the paper you used is a bit thicker. So you will need to punch holes through the folds 1 or 2 at a time.

So get a pin and pierce a hole through all the folds.

This hole will show you where to place the hole puncher so all your holes are uniform.

Now take your hole punch and place where the pin hole is and punch a hole through.

Repeat this step until you punch holes through all the folds.

Now insert a paper straw through all the folds and unfold to make your accordion paper Christmas tree.

Attach the paper star and stick it to the top of the tree.

 If you have a different coloured craft foam or coloured paper, you could trace the paper star on the foam or paper and cut out a star shape.

Now decorate your folded paper Christmas tree any way you want with poms moms, craft gems, or even different coloured paper shapes.


Looking for more simple christmas crafts for kids to do at home? Try these.

 Toilet roll christmas tree craft

Paper plate Christmas Wreath

Printable Christmas Tree Accessories

Christmas tree card

Toilet Roll Christmas Tree

Get creative and turn your finished loo rolls into a Christmas decorative ornament.

This paper Christmas tree craft is a great Christmas craft idea kids can make to get them involved in the decorating the house for the Christmas season.

And once your toilet roll Christmas tree craft is complete, you can adorn your mantlepiece or the window sill with it.

Turn your everyday toilet rolls into a festive masterpiece with our Toilet Roll Christmas Tree Craft!

This creative and eco-friendly project is not only a fun way to repurpose materials but also a fantastic opportunity to bring the holiday spirit into your home.

Gather your empty toilet rolls, some colorful craft supplies, and let’s embark on a jolly crafting adventure!


How to make your Toilet Roll Christmas Tree Craft

Materials Needed.

  • Toilet paper roll
  • Green cardstock paper
  • PVA glue
  • Craft foam/ coloured paper
  • Craft punch
  • Mini pom poms

Instructions

Print out the 3 different sized templates on the green cardstock paper. Print free templates here.

Use the scissors to carefully cut out the printed templates.

Using the X as a guide, cut slits using a craft knife on all three of the templates.


Fold all four wings of each pyramid.Ensure you fold into the printed side.

This way you have a plain surface when fully assembled.

Now fold the side tabs. This is where the glue is to be applied.

Now fully folded and creased.

Apply glue to both side tabs one side.

Glue the side tabs to one side without tabs.

Repeat the process and complete the assembly of the pyramid.

Repeat the steps for the remaining two templates.

Take the smallest pyramid and gently push the slits inward. Apply glue around the slits.

Now gently place it on top of the mid-sized pyramid.

This will be smaller of the remaining pyramids.Do the same for the largest (remaining pyramid).

Apply glue to the base of the assembled pyramid and insert the toilet roll.This will serve as the tree trunk.

You may now decorate as you please.

You add a decorative or colorful tape to the base of the trunk.

Add texture to the trunk. You may use craft stones. Pearl effects hardening glue was used here.

Use craft punch to cut out little stars on foam or paper to decorate.

Use the mini pom poms or craft stones to decorate as you wish.

Enjoy

Exit mobile version