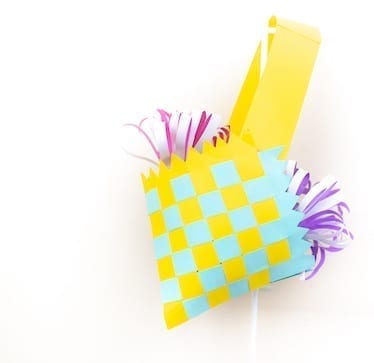
Origami Pouches

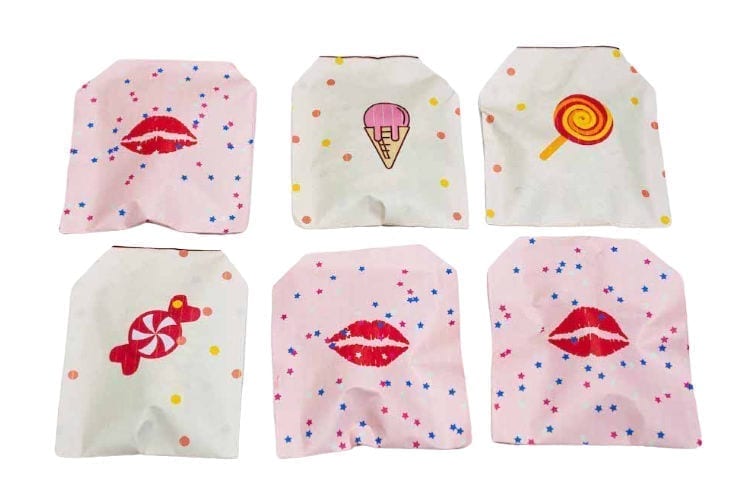
Simple Paper Pouch

A paper pouch is a simple craft kids can make that are both eye catching and practical.

Paper pouches can be used to gift surprise tokens, sweets, jewellery or small items.

To make your origami pouches, you will need

  • Plain or patterned paper.
  • Scissors
  • Glue
  • Templates

The dimensions for the paper is 18cm by 28cm. This yields 3 pouches.

How To Make Origami Paper Pouch

Cut a plain paper measuring 18cm by 24cm. You could also print any of the free templates

Fold in half.

Fold into equal thirds.

Cut a small slant on either side of the folded paper.

Open it up and glue the folded lines. Only apply glue to the vertical lines on one half of the paper. Then glue together. Do not glue the top.

Let it dry.

Cut the pouches.

Insert your tokens or gifts.

Seal the pouch.

Happy Crafting

Download free template here 

More Paper Crafts…

Paper princess crown

Paper sunflowers

Alphabet Spinners.

DIY Princess Crown

If you are looking for how to make a princess crown out of paper, then look no further.

This paper princess crown is a safe and creative paper craft for kids. No cutting involved here so barely any supervision needed.

Make this DIY paper crown as craft activities for kids at parties or fun school crafts.

It is an especially fun and cool crafts for kids when they get to the decoration stage. Giving them paper crowns to decorate will make them love the project as they have decorated it themselves.

Materials needed to Paper Crown 

How To Make a Princess Crown

Take a square paper and lay it flat on a surface

Fold as accurately as possible in half

As shown below, fold the left and right hand sides to me meet in the middle

Fold the tip at the bottom to touch the base of the triangle

Repeat the above step

Repeat one more time. It should look like a yatch.

Create 7 more of these.

Apply some glue to the right side of one and glue to the left side of another piece.

Make sure the sides showing the folds are all one the same side.

Glue all eight pieces together.

Glue the sides of the chain together and form a crown.

Punch out 8 circles using the craft punch.

Stick gems on them and place spikes of the crown.

Check out these cool crafts for kids you can make with paper

Alphabet Boxes

Make paper dice the easy way

Paper basket with handle

Alphabet Spinners

Alphabet spinners provide a fun and exciting way of helping kids master the alphabet.

Printable Alphabet Crafts

It also helps the kids recognise letter and words thereby making the connection to the everyday things, animal or objects on the alphabet wheel.

Benefits of using the alphabet spinner as a learning aid

  • It is fun and interesting way to teach as the kids see it more as a game.
  • Word recognition helps develop reading ability faster
  • The alphabet spinners can be used anywhere in the home, at school or even in the car on a long journey.

How to make Printable Alphabet Spinners

You will need:

Card stock paper

Paper fasteners 

Scissors

Wooden skewer

Instructions

Print out the free alphabet spinner template pdf file.  Download the template for free below.

Enter your email below and it is sent to your email address

You may use normal printing paper but it is highly recommended that you use card stock paper as they are more durable.

The top part of the spinner can be printed on coloured paper while the bottom part should be printed on white paper.


Using the scissors, cut out the circles. The top part printed on the coloured paper and the bottom part printed on the white paper.

If you doing this process with kids, make sure they are properly supervised.

Poke holes in the centre of the circles using a wooden skewer or a sharp pen.

Lay the top part on the bottom part and align properly.

Take a paper fastener and push through the hole.

Pull apart the paper fastener so that it holds both cut outs tightly but still loose enough to spin

This is a great printable abc activity idea for preschoolers that can be made to supplement the learning of your children at home.

More Educational Crafts you may like Multiplication tables Spinners Times tables bookmark

Paper alphabet blocks

Get the free printable A-J printable

Paper Sunflowers

Paper Sunflowers

You can enliven your living space with paper sunflowers. They are easy to make and great crafting exercise you can do with kids.

This method requires cut a lot of paper off a printed template so may require the presence of a grown up

The materials or equipment that are needed to make paper sunflowers include

Subscribe for more videos

  • Yellow paper
  • Brown paper
  • Dowelling rod or wooden skewers
  • Glue
  • Scissors
  • Green acrylic paint
  • Coloring brush

Print templates from the free resource library

How to make paper sunflowers.

  1. Cut out of the brown paper, circles that are 7.5cm in diameter. If you don’t have brown paper, you may print out brown coloured circles on a white paper and cut them out.
  2. Print the templates for the yellow sunflower petal and green leaves. Cut out the leaves using a pair of scissors.
  3. Colour the dowelling rods or wooden skewers with the green acrylic paint and let them dry
  4. Glue the green leaves quite sparsely on the dowelling rod
  5. Take a brown paper circle and start glueing the end of the petals to the back. Ensure the petals overlap each other slightly.
  6. When the petals have completely covered the brown circle paper, take the leaf adorned dowelling rod and hot glue the sunflower head at the back.

Crafting Tips

  • Keep the crafting theme going by pairing with a paper mache vase
  • Cut little bits of crepe paper and glue them on the brown card for an even authentic look


Download the free template here

Share or pin this project

More paper craft projects

Paper alphabet blocks

Woven Paper basket

Paper christmas star


Paper Alphabet Blocks

Paper Alphabet Blocks are great learning tools for kids. They are great at helping kids learn to spell and play other word games.

You will need the following

  • Printable alphabet box template (Get the full A-Z template free)
  • A4 or Letter size cardstock
  • Glue
  • Scissors


How to make your own Paper Alphabet Blocks

  1. Print the template if you want the exact design in the images. You can also print a plain one to customise your own. Receive the templates when you sign up with your email below.


2. Cut out the templates along the lines.

3. Fold the cut out templates along the lines

4. Glue together all the sides.

5. Let the glued sides dry or stick

Suggestions

You may build your own cube using the blank template and the customising your box.

You write numbers, letters or draw shapes

You could also use a felt pen to make dots on the cubes and turn it into paper dice

You may cover in wrapping paper, attach a string and use as an accessory on a Christmas tree

It can also serve as a box with a lid. Don’t glue the top of the box shut and you can keep game cards and other learning aids

You can also get the kids involved by building paper boxes using the plain template and encourage them to design their own individual box. Decoration ideas could involve colouring, drawing, or sticking shapes on the boxes.


Check out a similar paper craft project on how to make a paper dice the easy way without using a printable template.

Get the free template 

Looking for more cube based craft ideas, check out the cube box printable templates

If you are looking for something different, how about some paper mache projects like

Eye popping paper mache fruit bowl or centrepiece 

Paper mache photo frame

Find more paper crafts for kids or educational crafts 


How to make a paper dice the easy way

How to make Paper Dice

If you  desperately need a pair of dice to play that boardgame that has been gathering dust on the shelf, here is a simple way to make paper dice .

This is simply the easiest way to make dice without glue or tape

Subscribe here for craft videos

You can also use this tutorial to make a paper cube and scale up or down as required.

This is also a great way to improve your paper crafting skills.

You will need the following

  • 6cm x 6cm Paper (6 pieces)
  • Felt pen

How do you make a paper dice?

  1. Mark the half way point and fold the top left and top right corner to meet midpoint.
  2. Turn the paper horizontally and repeat the above step.
  3. Do the same for the remaining 5 pieces of paper
  4. Start to insert one into the other until you form a cube.
  5. Using a felt pen or marker, make dots on all the sides of the cube.


You can make far smaller dice for board games or very big cubes for craft projects by simply scaling up or down.

You can also make paper dice using Printable paper dice template.

  • Simply print out the template
  • Cut out the template
  • Fold the inside lines
  • Using glue, form into a cube along the tabs.

Apart from a paper dice, you can make teaching aids for kindergarten in the form of alphabet blocks. Instead of dots, put alphabets


More craft tutorials?

How to make paper mache photo frame

How to make paper mache fruit bowl

Gift wrapping with brown paper

Pin or share this tutorial

3d Christmas paper stars

How to make 3d Christmas paper stars

If you are looking for an easy diy christmas decoration or christmas craft idea,  3d Christmas paper stars are the way to go.

You can easily create these in many colours to fit your colour themes and more importantly can be done with the family.

Tools you will need

  • Coloured Paper (12 by 12cm) 5 squares
  • Scissors
  • Glue


Instructions

  1. Take a cut square and fold in half
  2. Pull the other half and overlap a bit. Glue the overlapped edge.
  3. Fold about 0.6cm from edge of both sides
  4. Unfold and push in the edges
  5. Fold in half lengthwise and glue together
  6. Draw the pattern shown on one side and cut with a scissors
  7. Repeat the process with the remaining papers
  8. Glue all of them together
  9. Unravel and glue the remaining two sides together to form your 3d christmas paper star.

As a party decoration, use a mix of different colours. You could also try stars with 2 colours.

As christmas decorations, use the traditional christmas colours of green, red and gold.

Looking for more christmas craft ideas, try making your own paper frills for lamb cutlets or turkey legs or woven paper basket which could used as christmas stockings


Woven Paper Basket with Handle

Woven paper basket is a great craft activity for just about any level.

It is a great alternative to christmas stocking, can be used as party decorations or even hang it on a christmas tree.

Woven Paper Basket with Handle

Great as party decorations, stocking filler alternatives or as a christmas tree accessory.

Tools needed

  • 2 Different Coloured papers
  • Scissors
  • Glue
  1. Fold the papers in half
  2. Mark 2 cms either side of the unfolded side (opened side) and draw a horizontal to meet each marking
  3. Mark 2 cm intervals on the horizontal line
  4. Mark 2 cm intervals on the folded side
  5. Draw a line to connect each marking on opposite sides
  6. cut slits from the folded side to the horizontal line
  7. Weave the slits until complete


Subscribe for more videos

Need more paper craft idea? Here is one on how to make paper frills to elegantly present your lamb cutlets to turkey at any celebratory dinner.

Also try paper star crafts


Exit mobile version