Frog Headband Craft

Looking to make a simple craft for spring or an animal themed activity? This Frog headband craft may just do the trick.

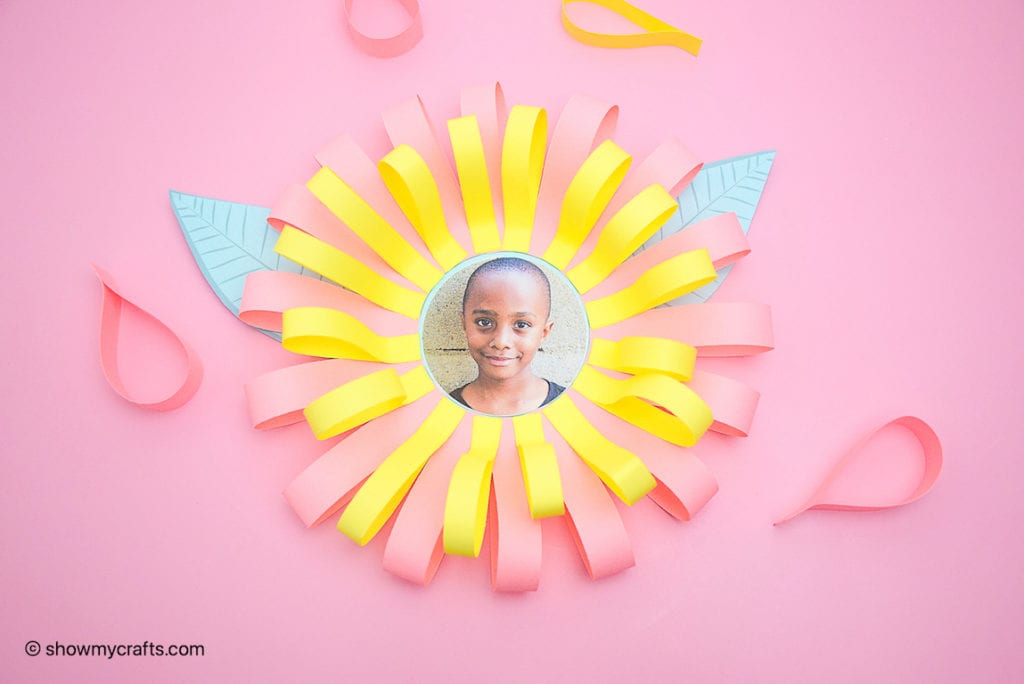
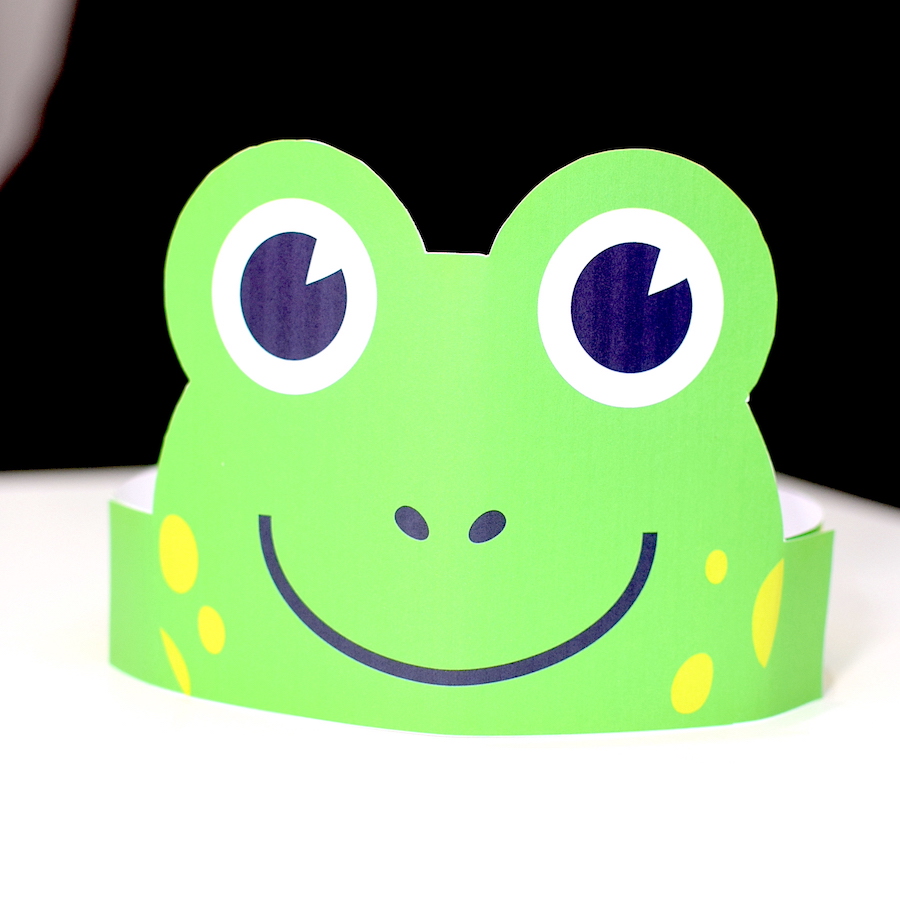
It simple and straightforward. You can make it with very little supplies.

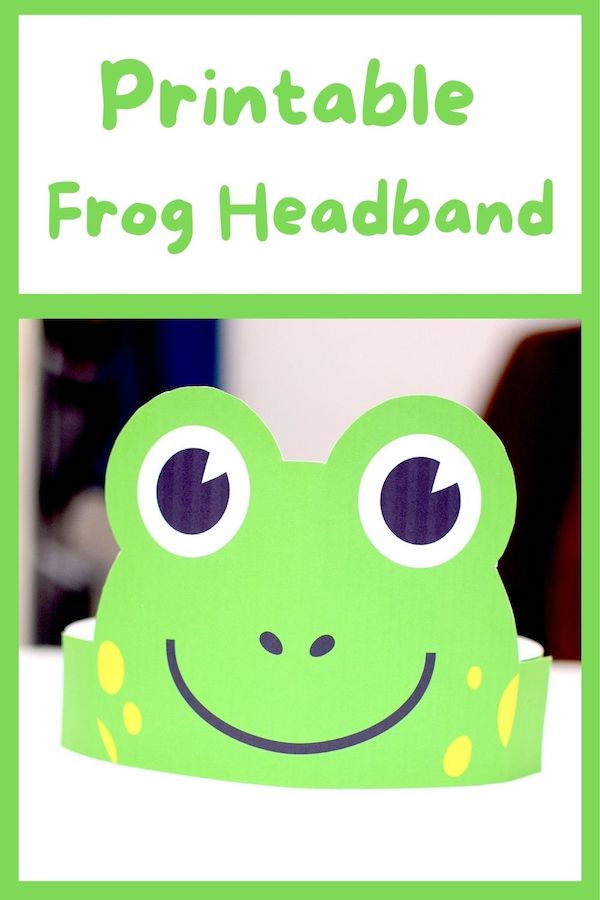
Even better, it comes a free printable frog hat template

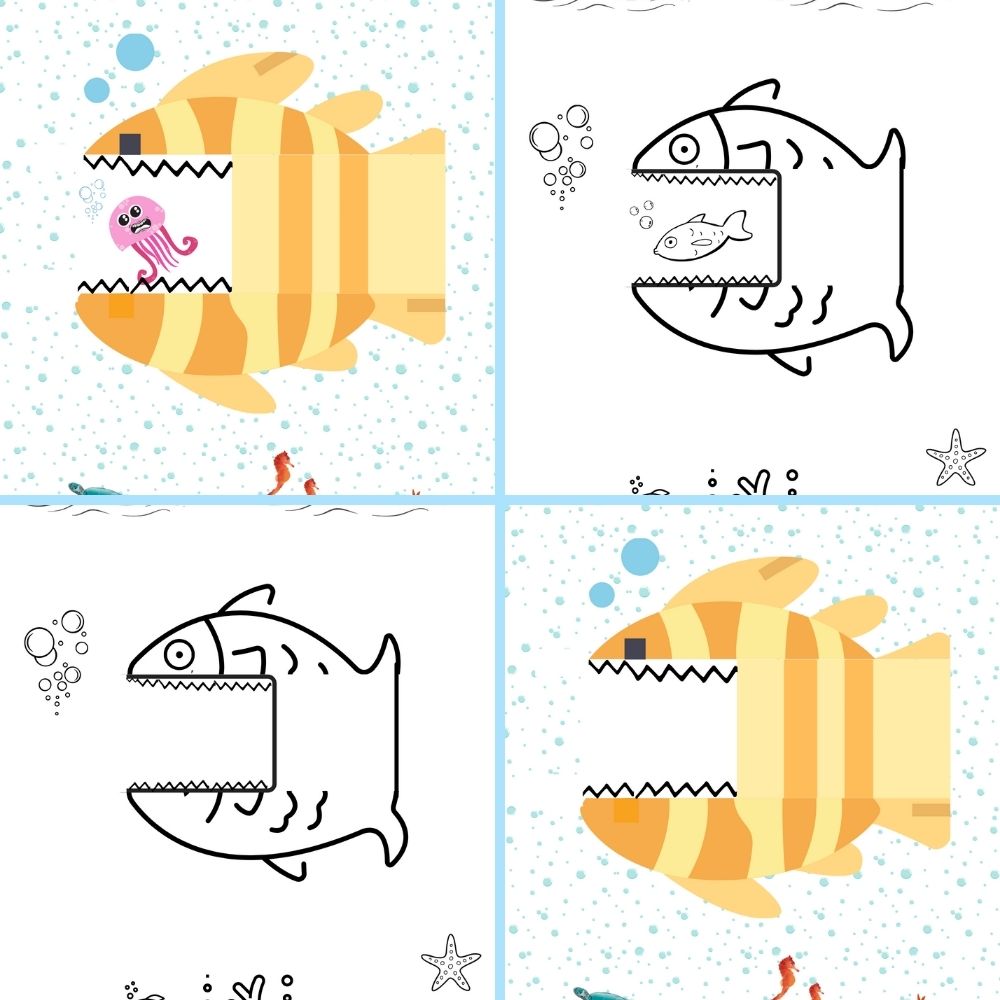
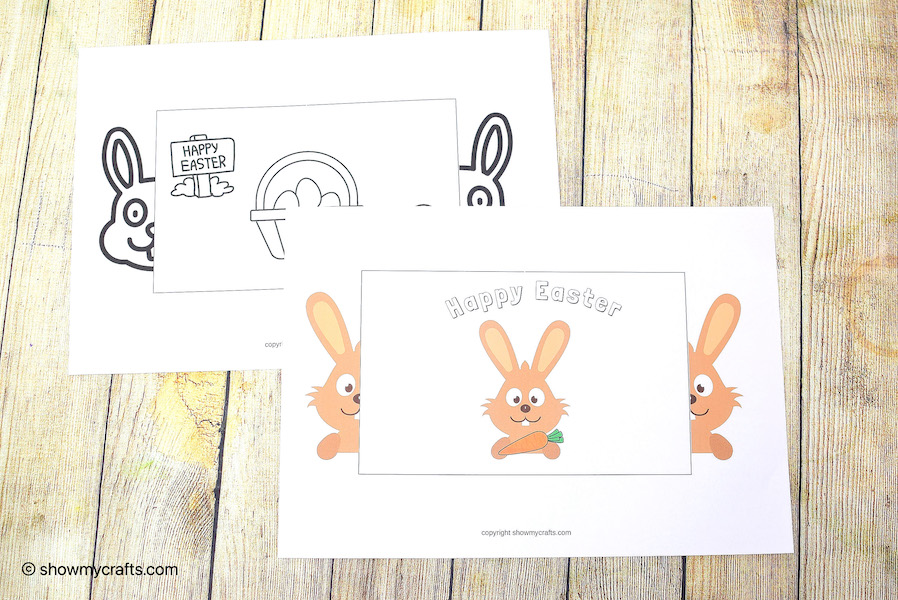
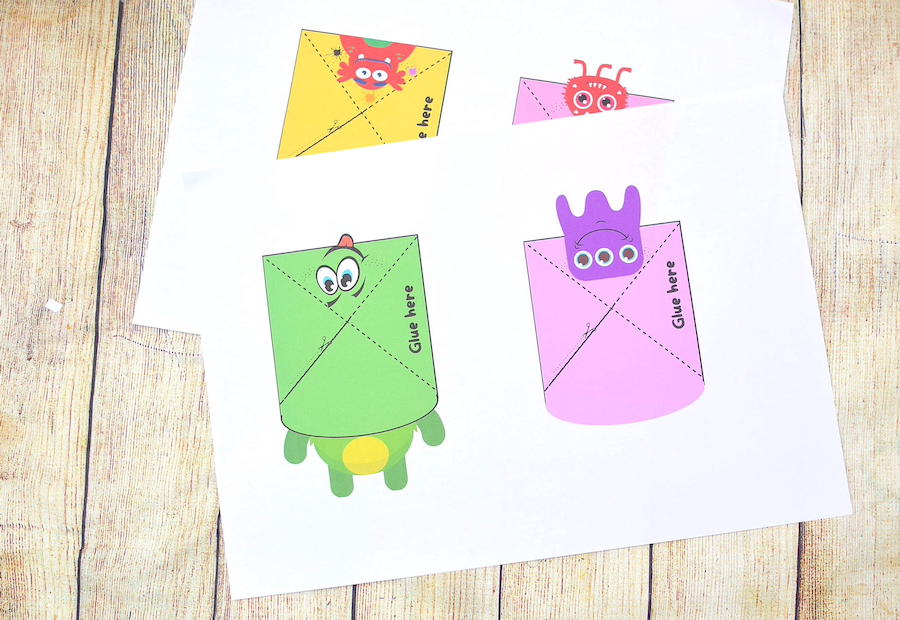
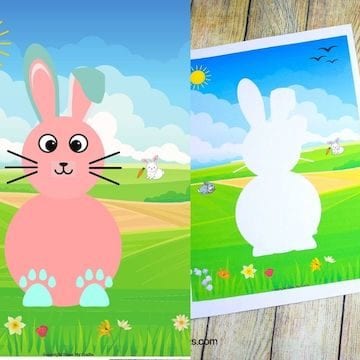
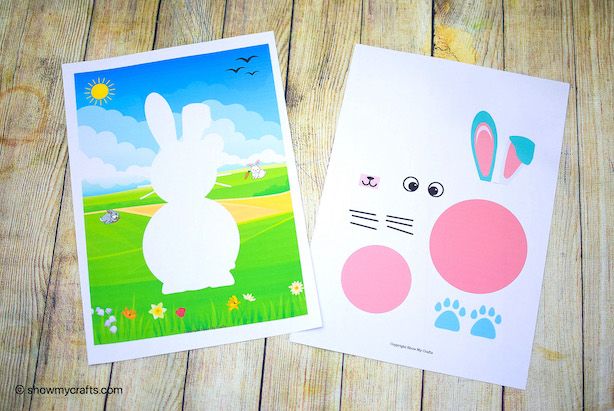
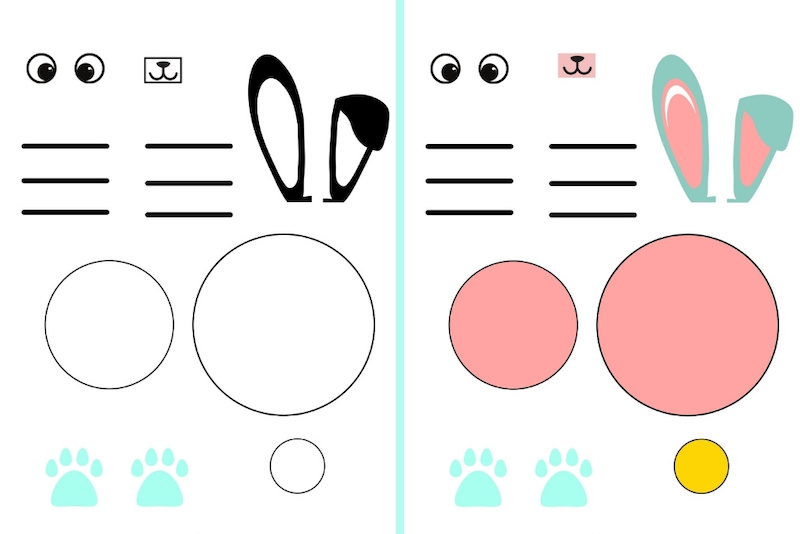
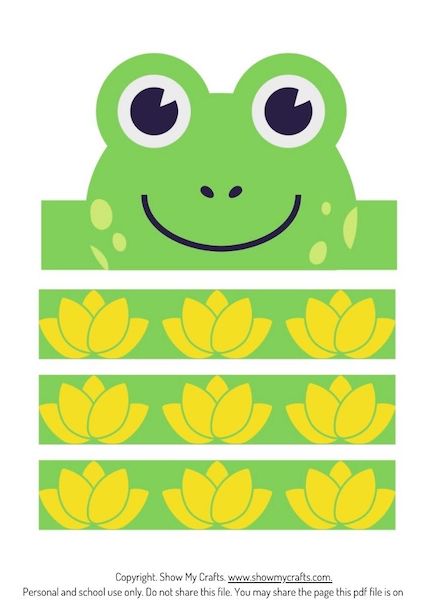
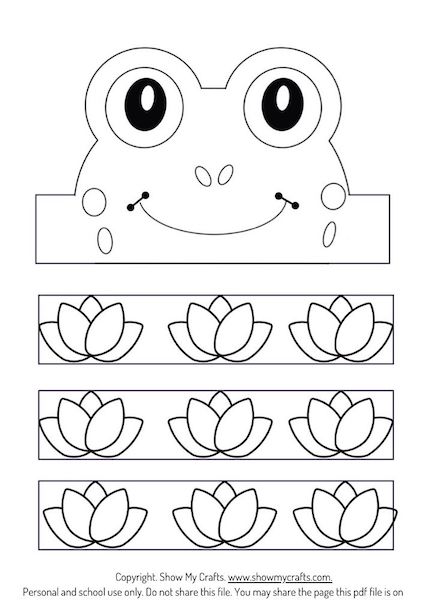
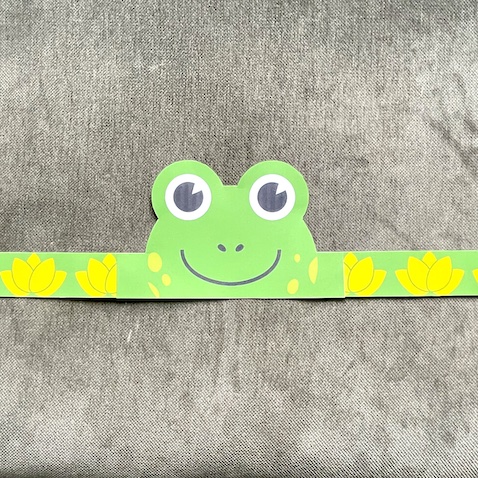
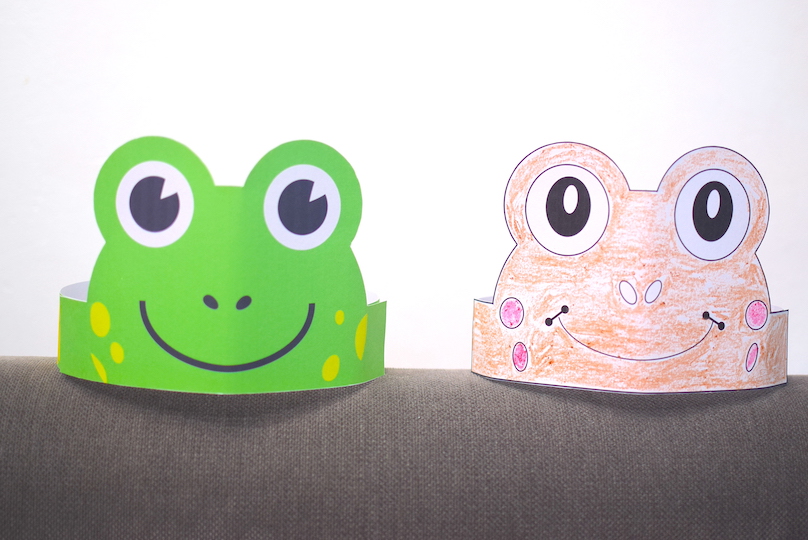
The Printable frog templates have an already coloured version that can be used straight away.

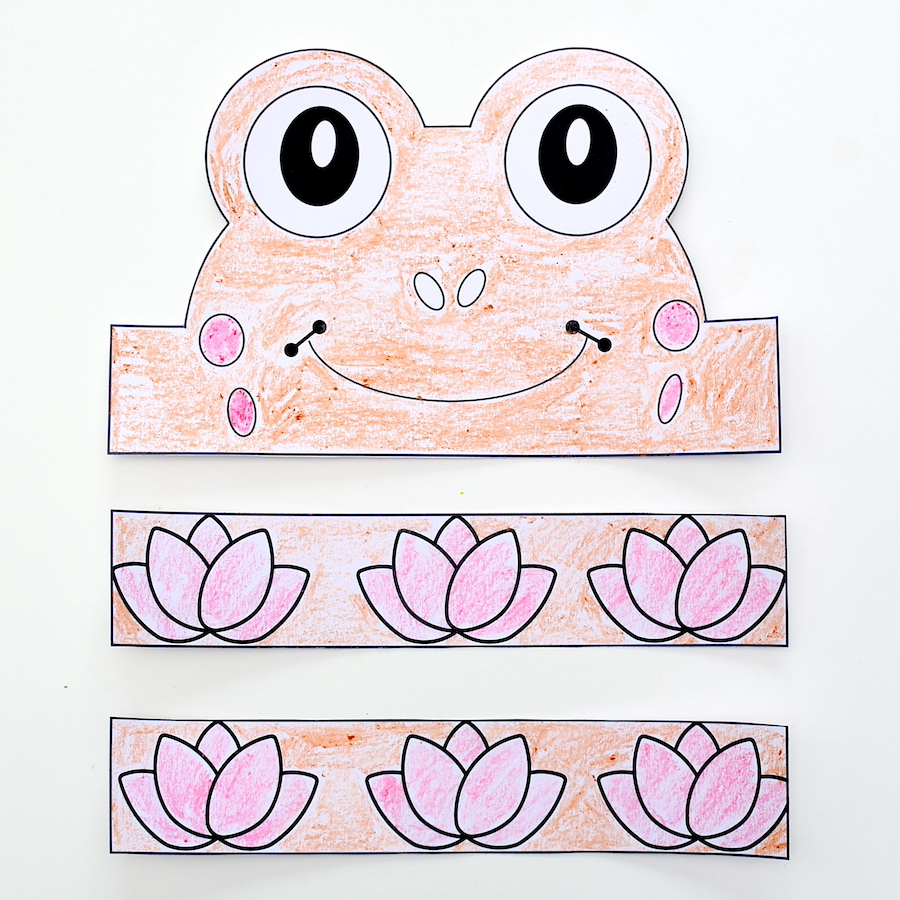
There is also a version of the frog template that might suit much younger kids. Get the markers, coloured pencils or crayons out.

They get to design their frog headband, personalise and express creativity.

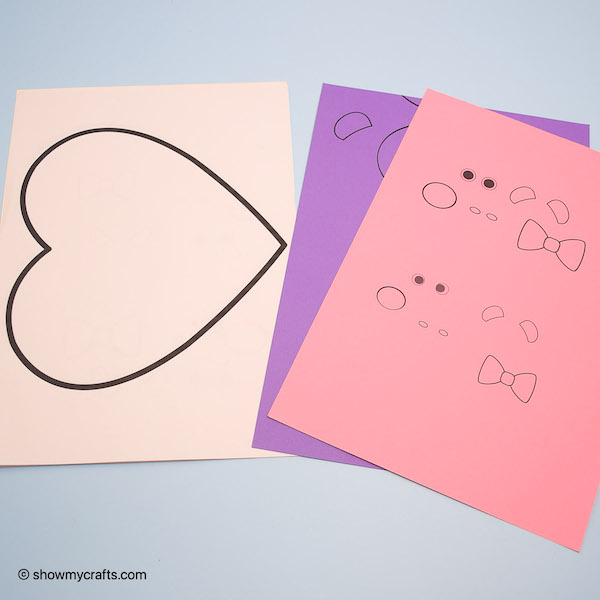
Materials needed to make your Frog Headband

  • White A4 Cardstock Paper
  • Scissors
  • Glue stick
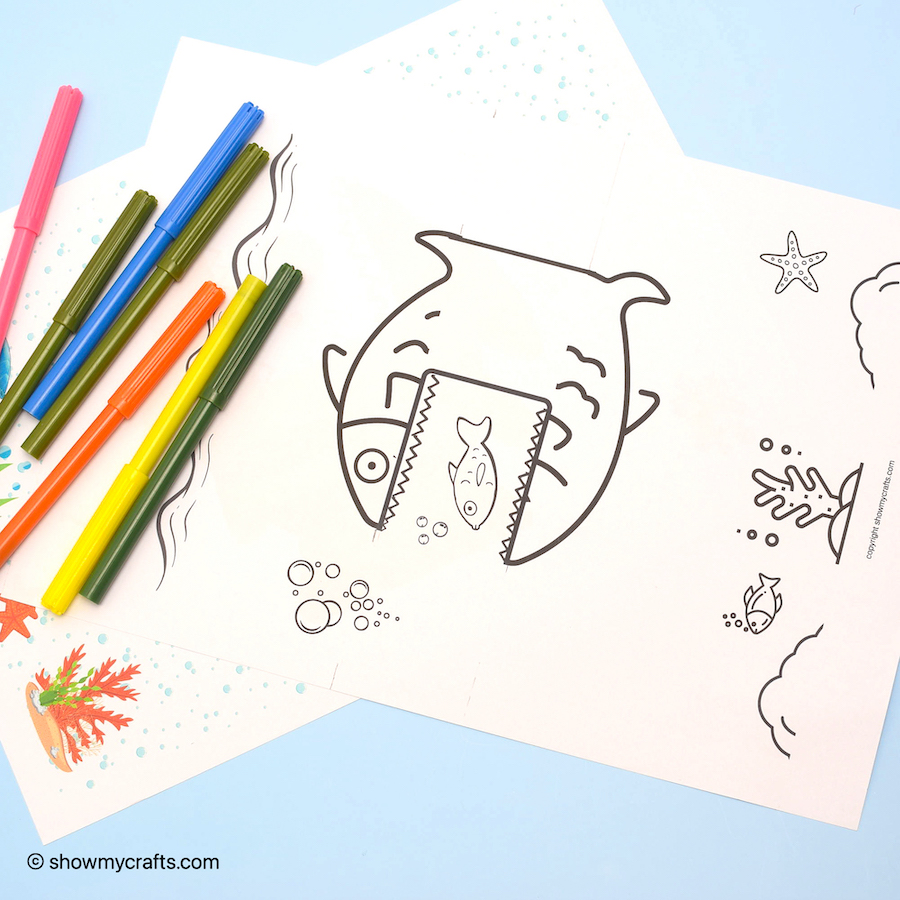
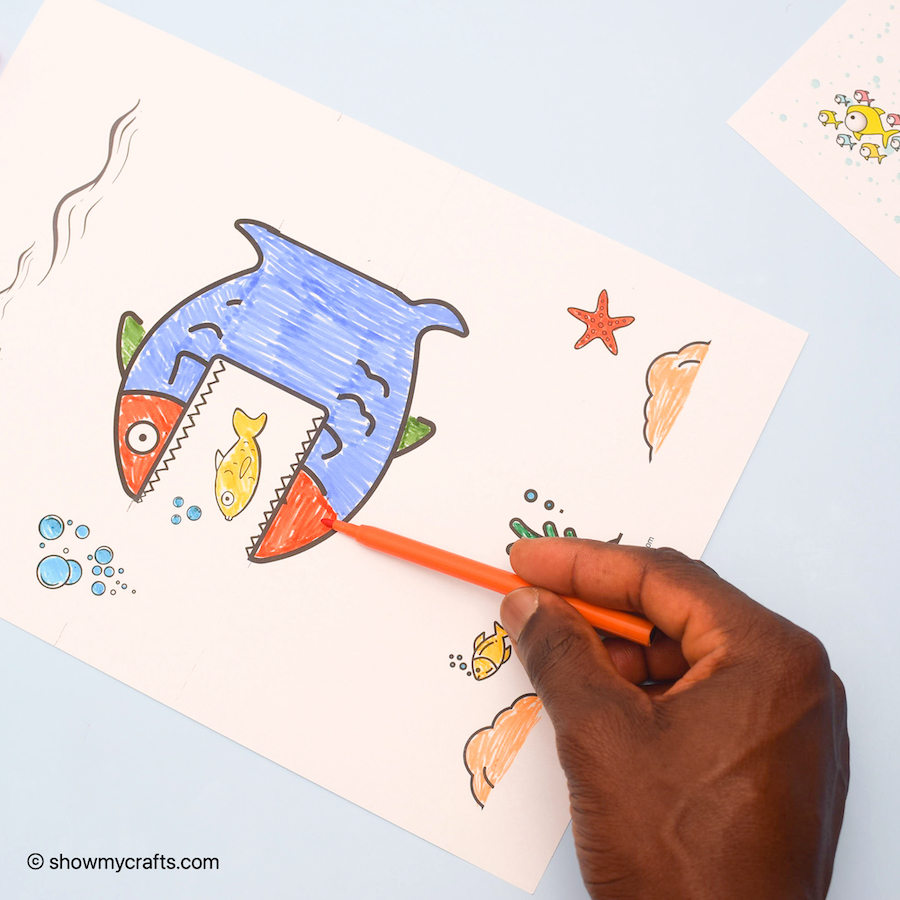
  • Markers, Coloured pencil or Crayon (if using the plain version)
  • Frog template (get this sent to your email at the end of this post)

How to Make Your Frog Headband 

Instructions

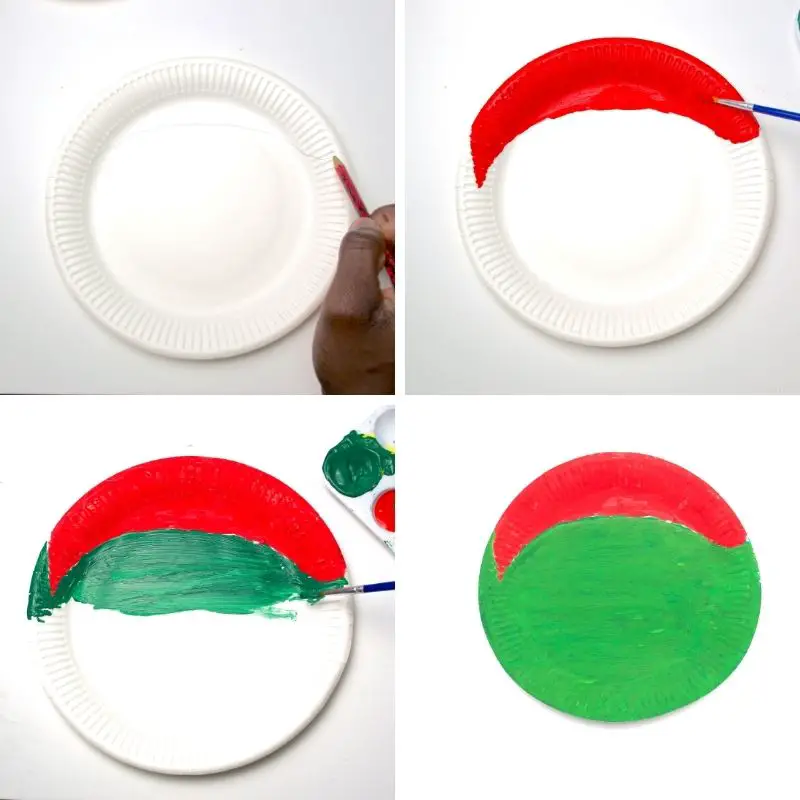
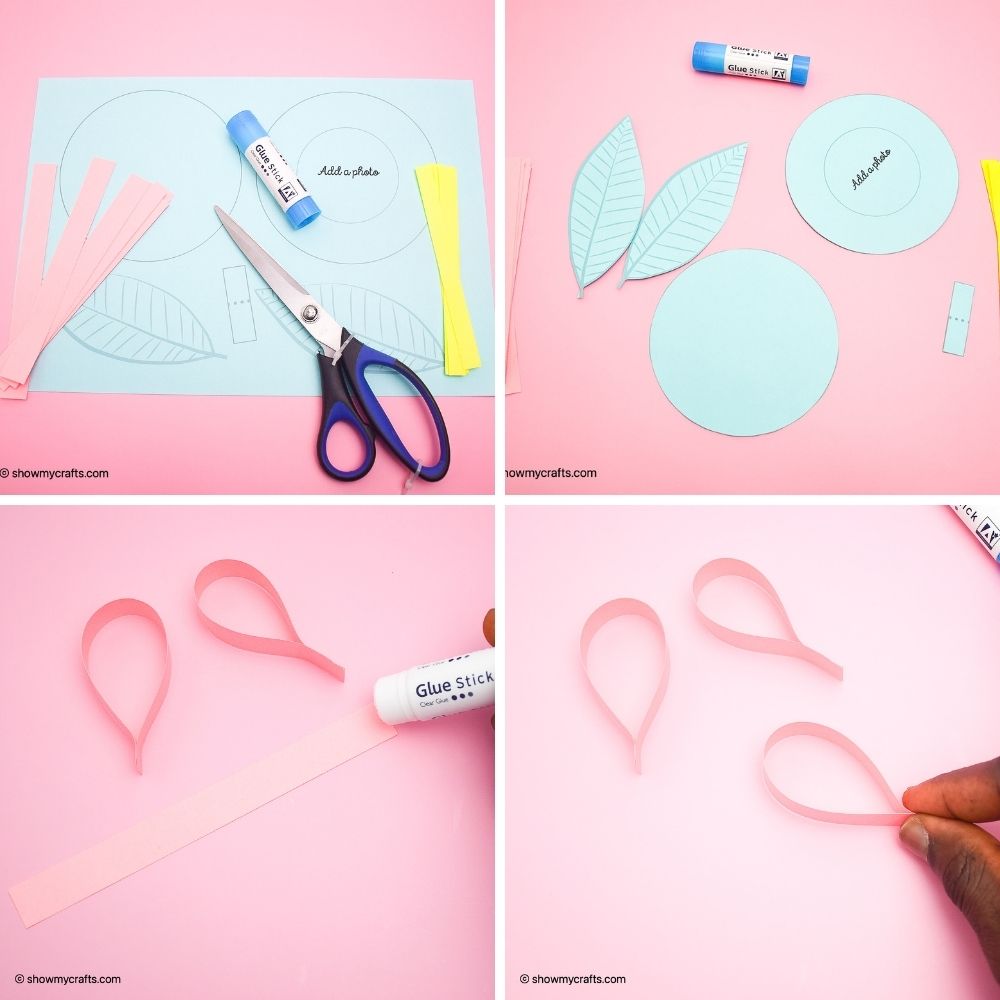
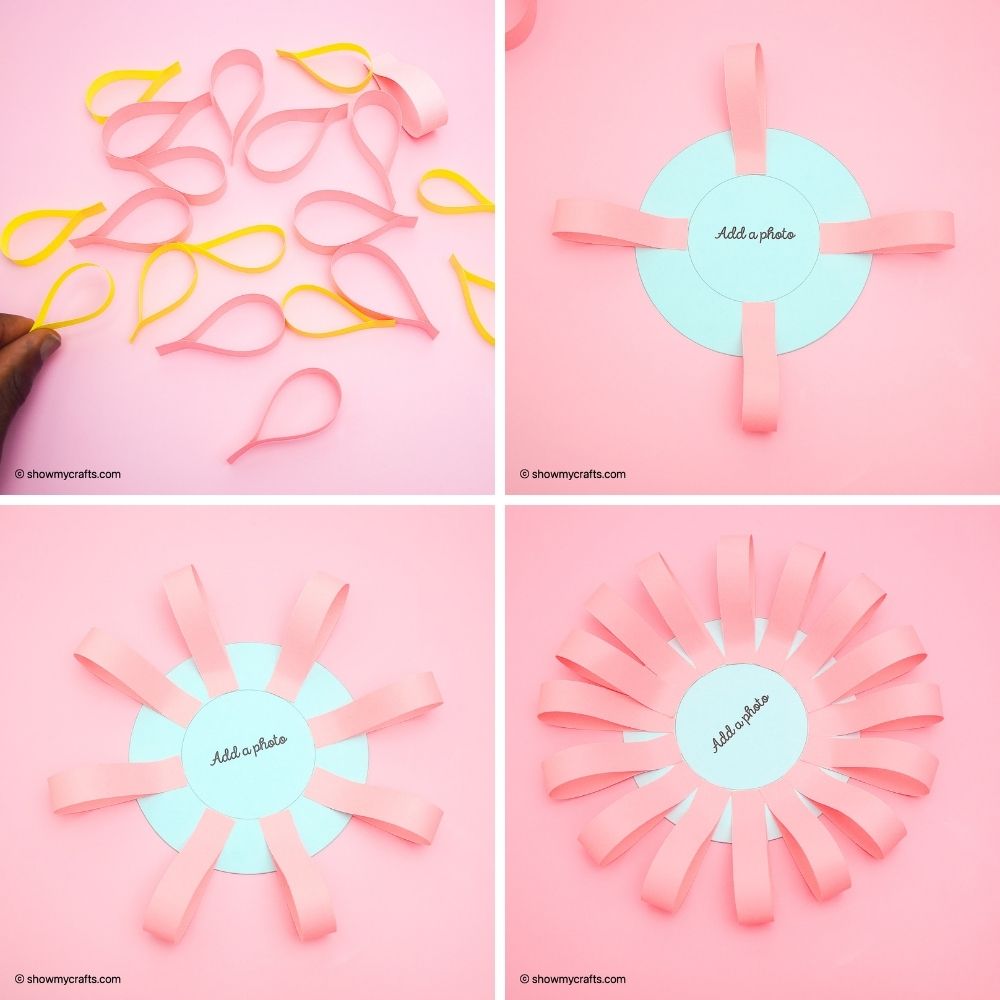
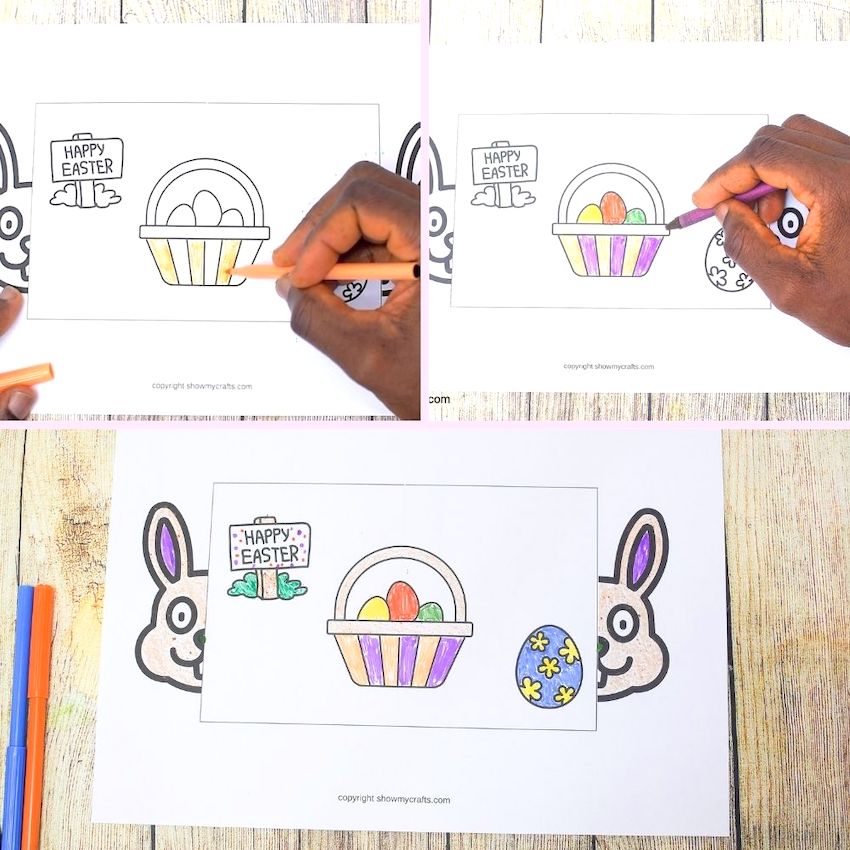
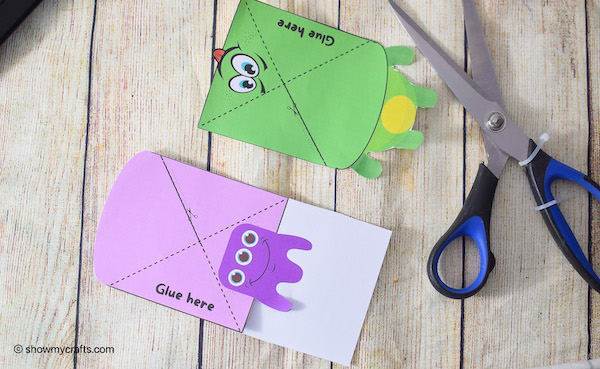
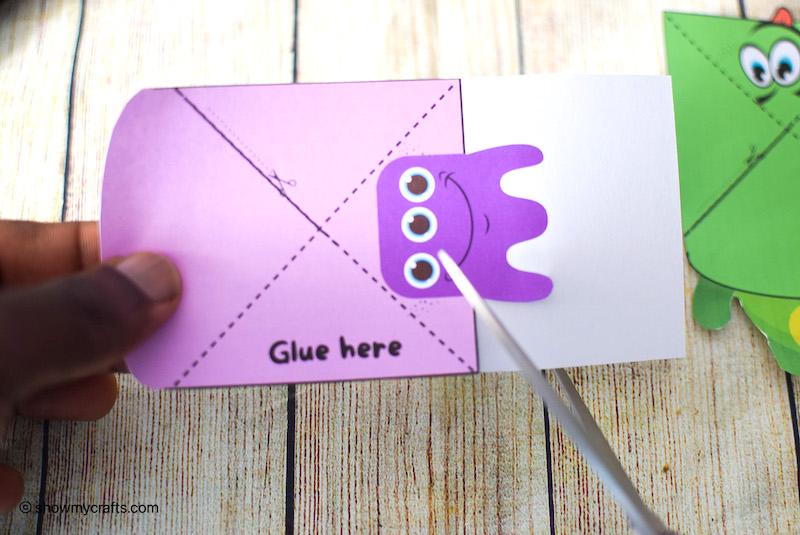
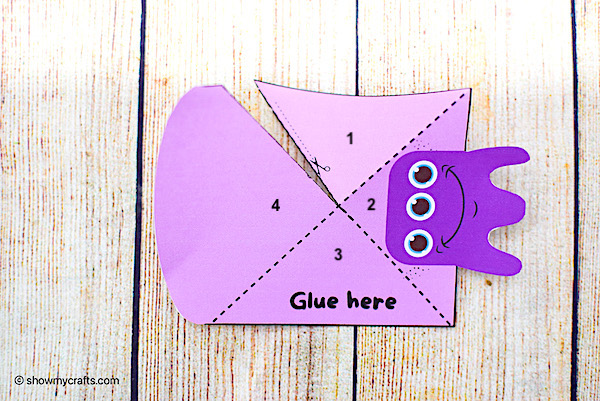
Download and print the frog headband template.

For ease, the coloured and plain templates are separate

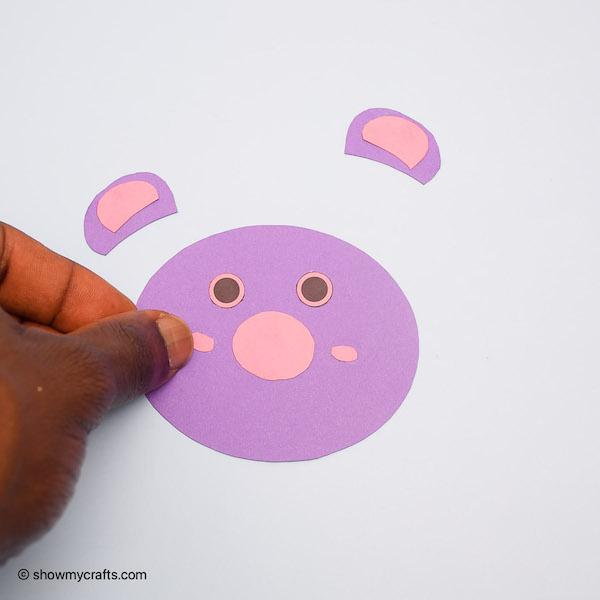
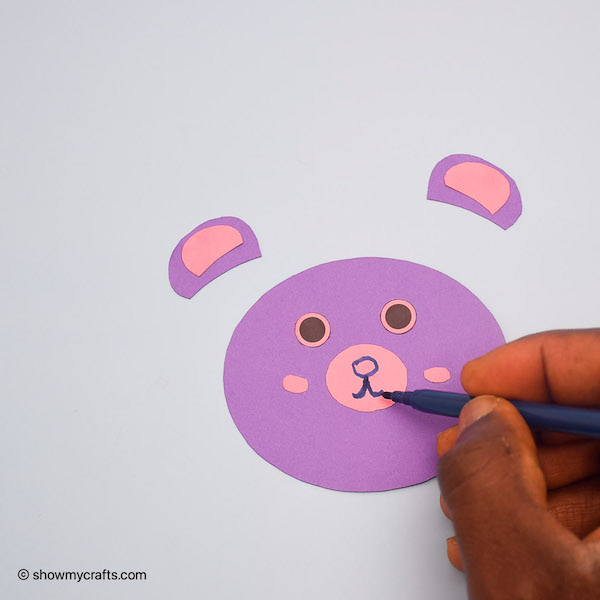
If you making the plain version, you have your child colour it in now.
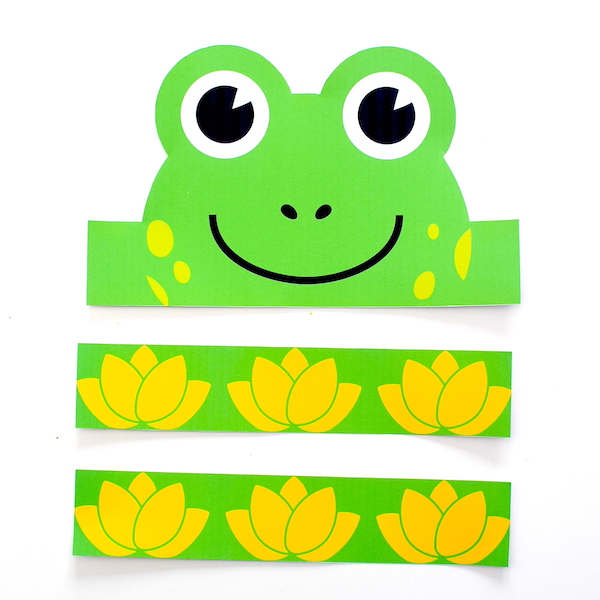
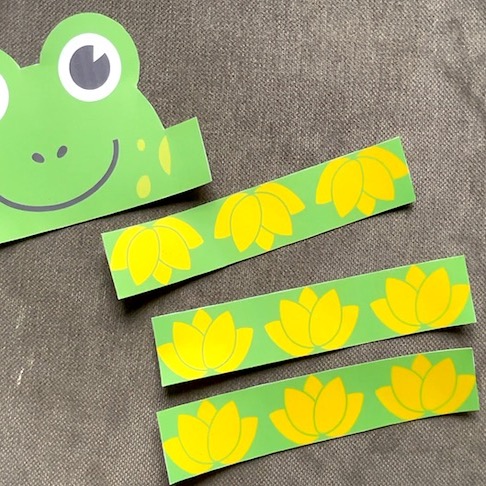
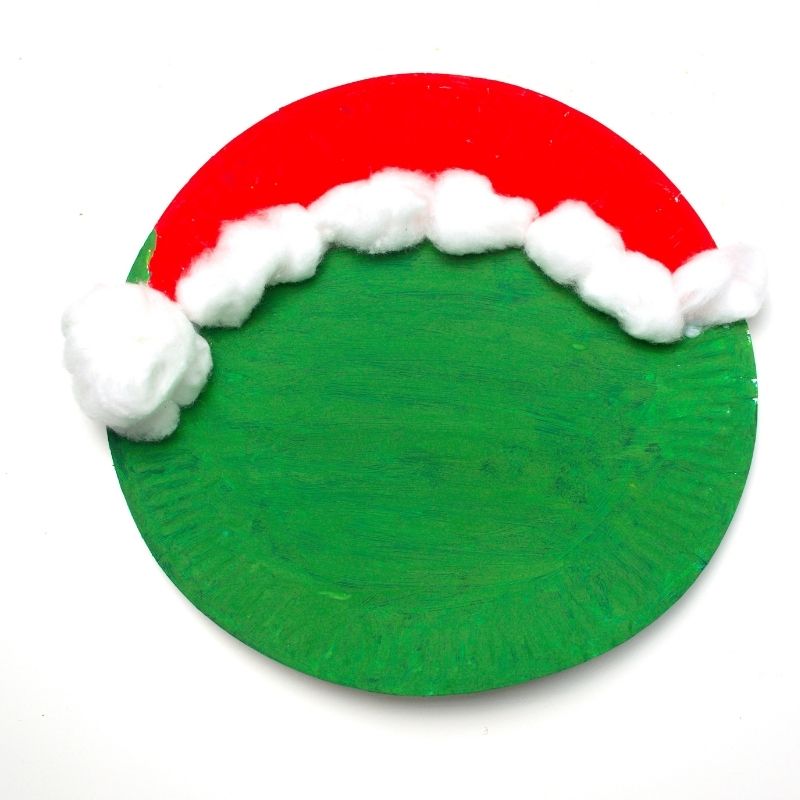
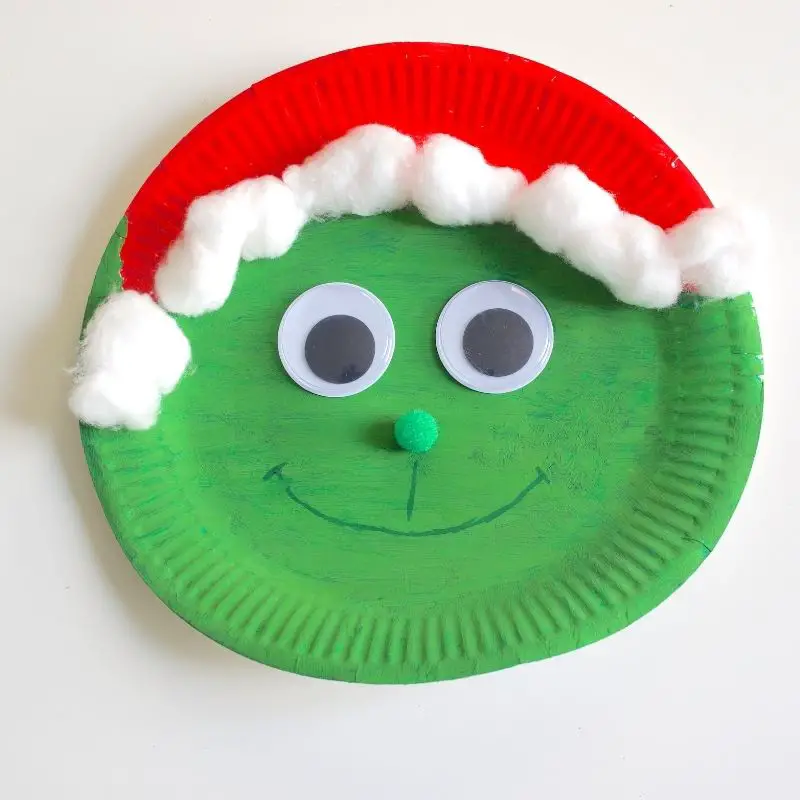
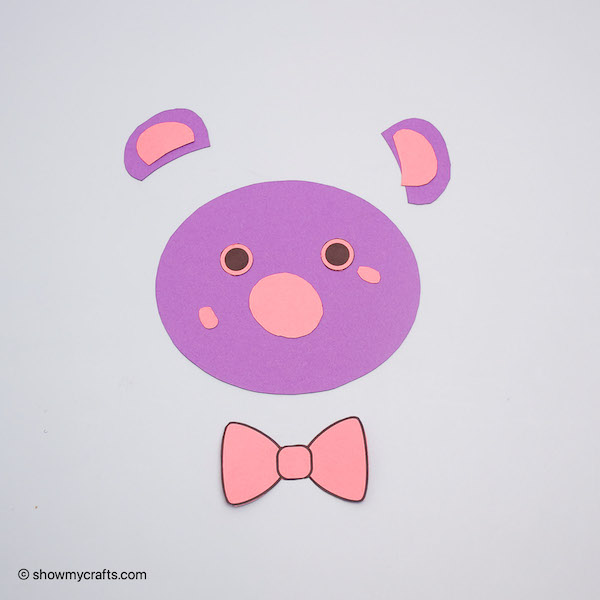
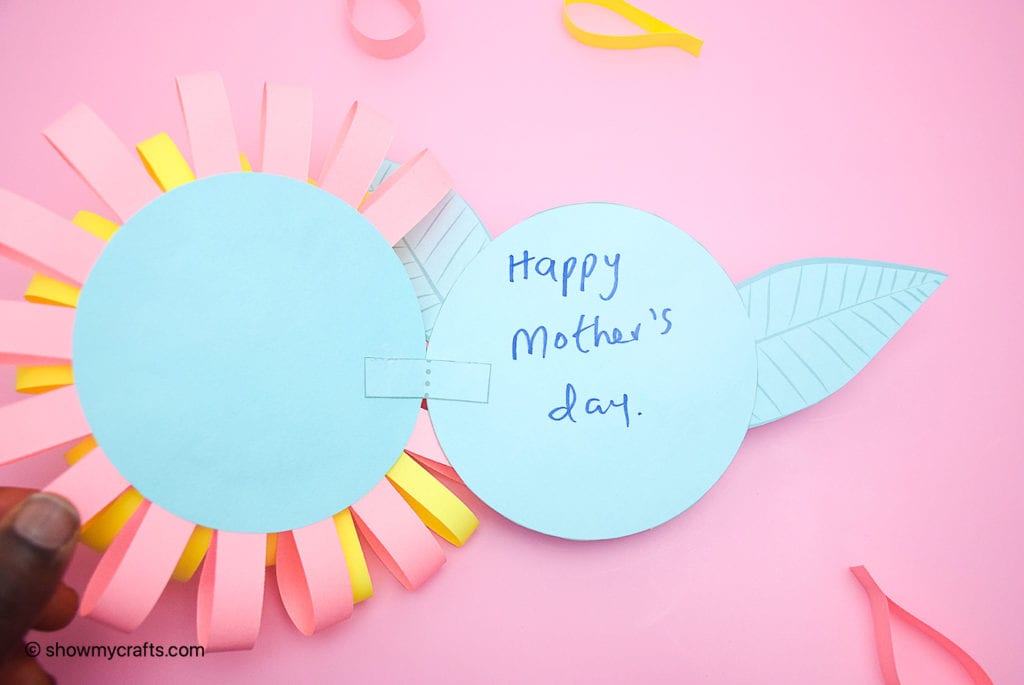
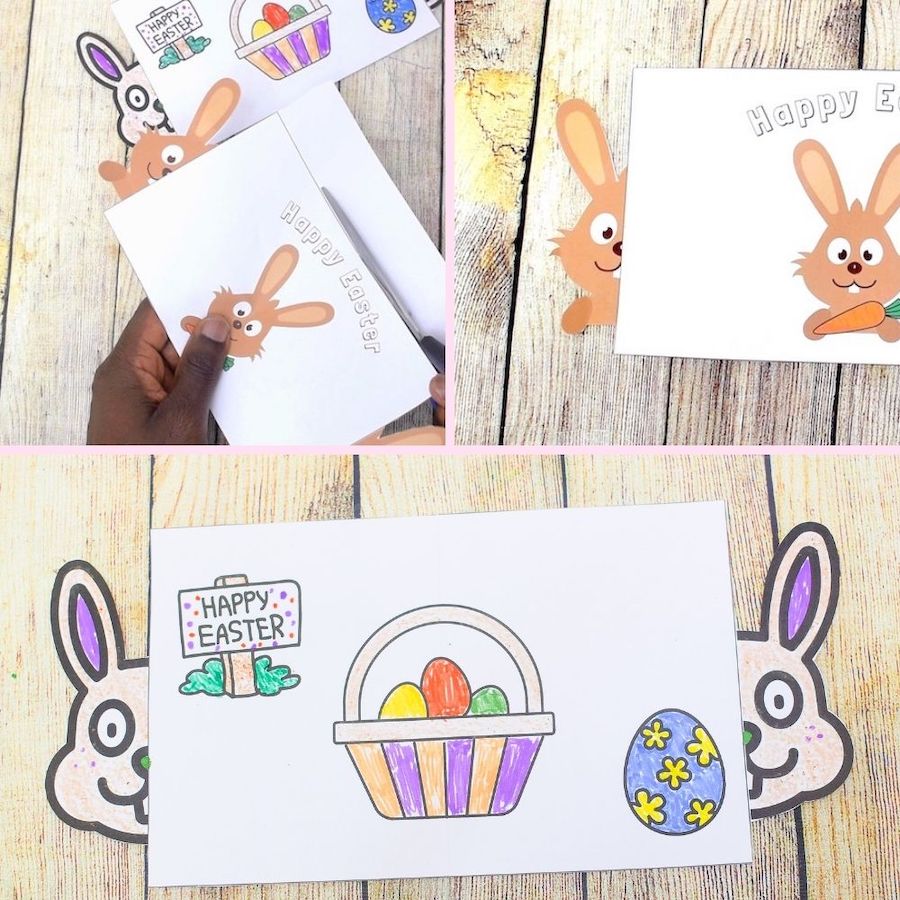
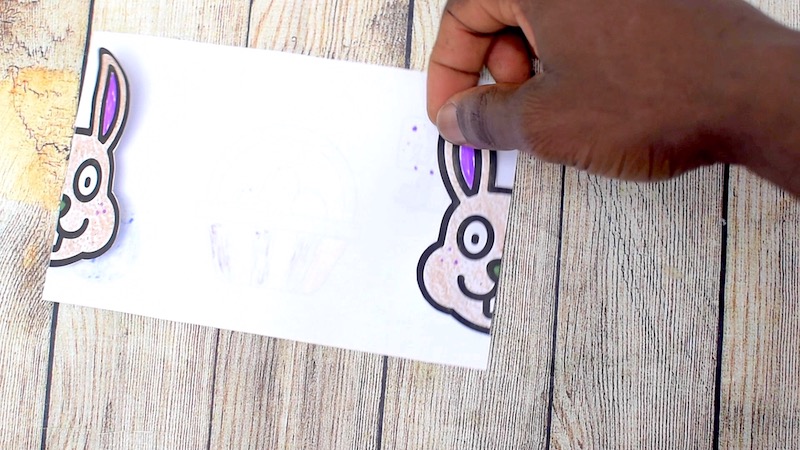
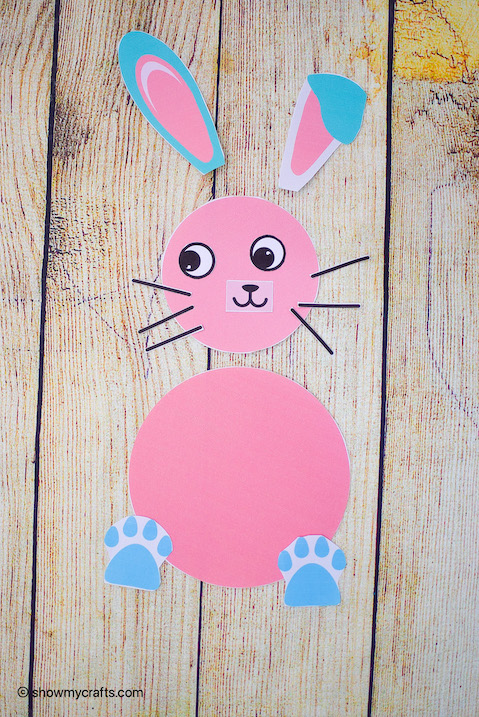
Cut out the frog face and the extenders. 

Two extenders are usually needed.

Cut along the lines to guarantee a neat cut.

Time to glue the extenders.

Using the glue stick, glue the extenders to both sides of the frog face.

Make sure they aligned on both sides.

Now close your paper frog hat by gluing both extenders 

Frog hat complete.

Whether it is for a costume party or just craft for home or school, this frog headband is sure to be a hit with the kids.

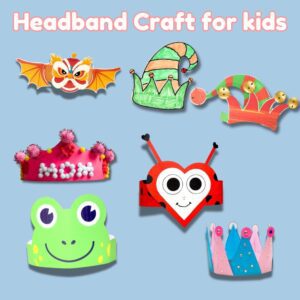
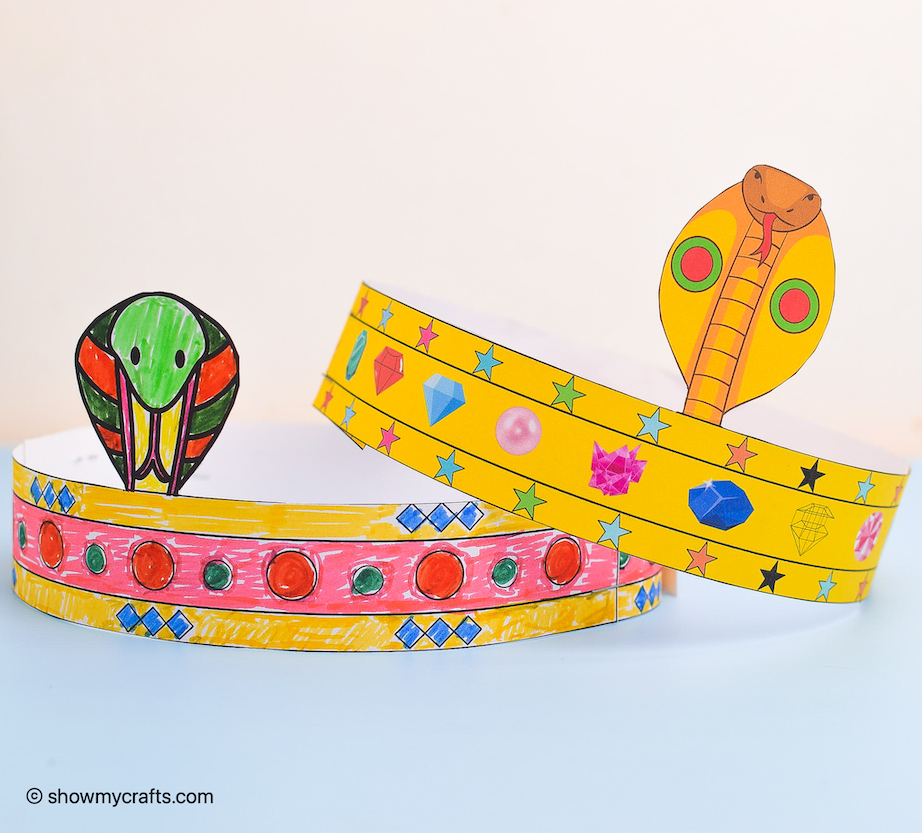
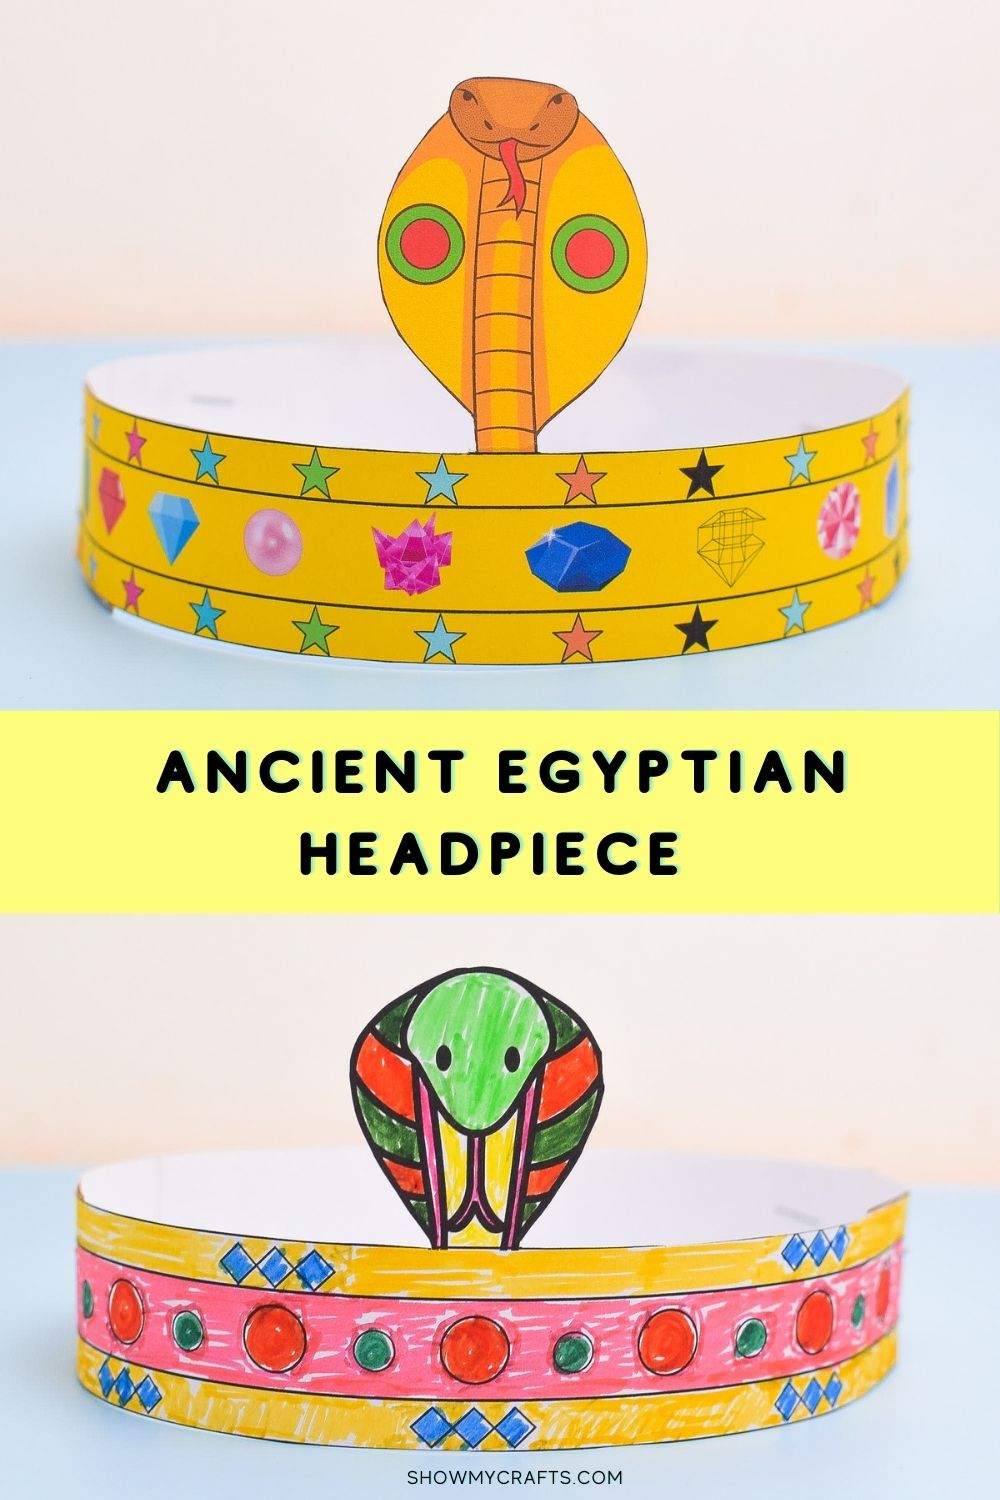
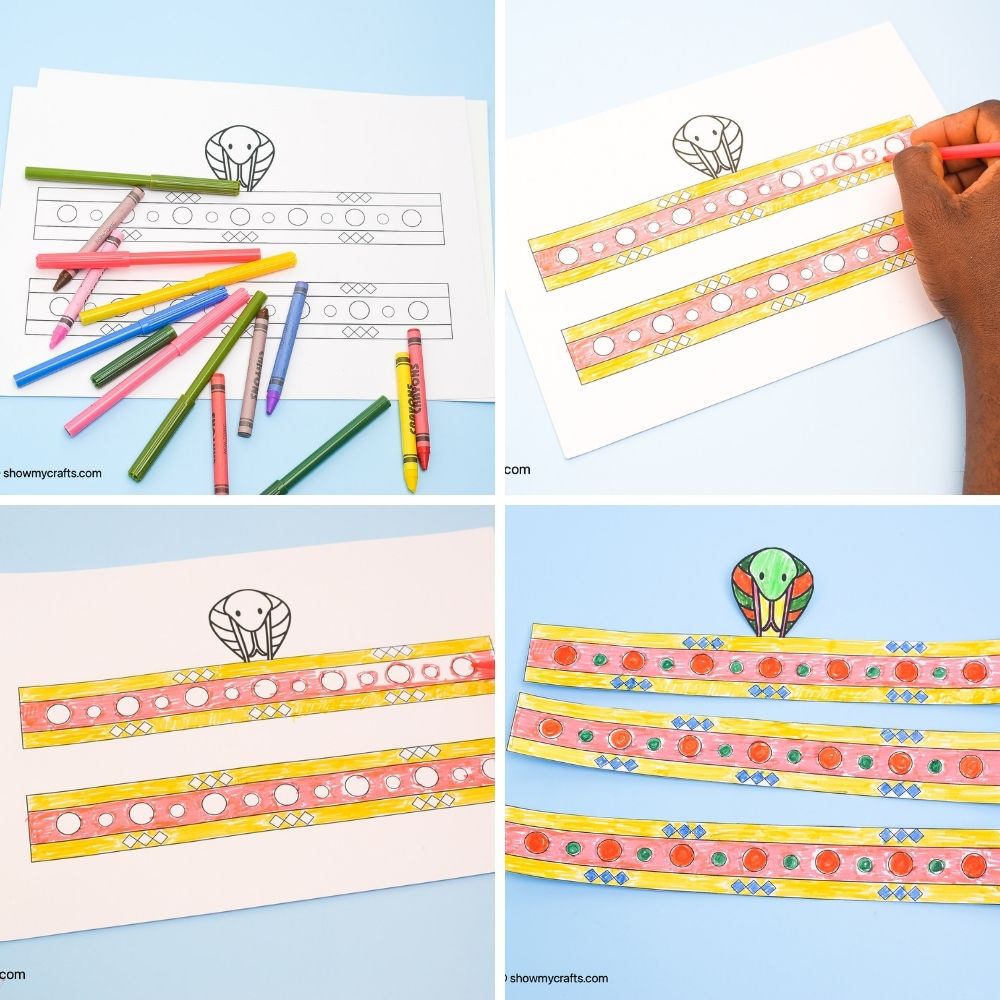
Need more Headband craft inspiration? Try this Egyptian Headband Craft

For even more frog themed activities , check out these free colouring pages

Frog Colouring Pages

Toad Colouring Pages

Frog Headband template

Full colour

Plain

Paper Plate Grinch

Still wondering how the grinch stole christmas? You can watch or re-watch the movie to find out. In the mean time, this Paper Plate Grinch Craft will do.

This is a fun christmas craft is just ideal for kids 3 years and above to get stuck in.

Even better if they have seen the movie, this will be even more fun to make because its a character they recognise.

This Grinch Paper Plate Craft has no cutting or scissor handling.

You will however, be painting so get your paint and brush out.

The Grinch’s Santa hat is painted red while the face is painted green.

If like me, you don’t have a green paint left out of your colours, you can always mix a blue and yellow to make green.

How to Make a Grinch Paper Plate Craft

Materials needed

  • Paper Plate
  • Acrylic or tempera paint
  • Paint brush 
  • Pva glue
  • Cotton wool
  • Google eyes
  • Pom pom
  • Marker 

Instructions

Using a marker or pencil draw a quarter moon shape at the top of the plate. This will be painted as Santa’s hat.


Squirt out some  red and green paint in a palette.

Paint the the top part red and then the rest should be painted green.

Let the paint dry thoroughly.

Apply pva glue to the lower edge of the part painted red. Also apply glue to the tip on the left hand side. Leave for a minute.

This paper plate grinch needs a Santa hat. Now, fluff out some cotton wools and arrange them on the glue to resemble hat.

Give the Grinch some eyes. Take two big google eyes and glue them on the paper plate.

Also take a mini pom pom and place under the eyes. Then finally, use a marker to draw the mouth. You can draw a smile or a frown.

Your Paper Plate Grinch is all done. 

Make sure it takes pride of place. You can hang it on the mantlepiece or under the christmas tree.

More Paper Plate Christmas Crafts You May Like

Using paper strips and glue you can make these beautiful paper plate christmas wreath that is fun for all to make.

Here is another kids Christmas wreath, simply make paper rolls and glue them.

Popsicle stick Snowflake Ornament

You can make christmas crafts and even memories with the kids with this Popsicle Stick Snowflake Ornament. This is a very fun Christmas craft that is perfectly suited for kids.

Try out different ways of turning plain craft tick into colourful and eye catching sparkly snowflake craft for kids.

If you are wondering how to make and decorate your snowflake ornament, there are numerous options to choose from.

Even better, kids as little as 3 can help make them some with supervison of course (steer clear of glue guns in this cake and use pva glue instead)

You may decorate your snowflake ornaments with colourful buttons, craft gem stones, bit of different coloured paper, sequins, colourful paper straws, glass beads and shown below even beans.


You can hang your popsicle stick snowflakes on the christmas tree alongside these Printable Christmas Tree Ornaments. Simply download the free template, cut, decorate and hang on the tree with minimal mess.

What you need to make Popsicle stick snowflake

  • Popsicle sticks or craft sticks. You can use already coloured popsicle sticks but if you want the added activity of colouring, a part of the decorating princess that will suit the little kids, you can opt for the plain popsicle stick.
  •  PVA Glue, Glue stick,  Glue dots, Glue gun. Pva glue is will work for every material you to adhere to the popsicle stick and is easiest for kids to work with but can be messy. Not to worry, its all part of the fun as kids love mess. Glue stick will work with paper but not so great if you want to glue grain. Glue gun works with all materials but is advisable to allow little kids to use them.
  • Gem or craft stones. Since we want our DIY snowflake ornament to be sparkly  craft stones will do the trick. These might not need to be glued as they are self adhesive. Make sure you use ones big enough to be handled by tiny hands.
  • Dot Markers or Acrylic paint and Brush. This is to paint the popsicle stick if you using plain ones or you could just buy already coloured ones.
  • Pipe cleaners, Buttons, Paper straws
  • Scissors

How do you make a snowflake out of popsicle stick?

Easy. Just glue them on top of each other to form star like shape.

Well then, How many popsicle sticks make a snowflake?

3 popsicle sticks make a snowflake.

Lay one stick diagonally, glue the second stick in the opposite direction.

Then glue the third stick vertically right in the centre.

How to Make Popsicle Stick Snowflake Ornament.

If using plain popsicle sticks, colour with different christmas colours. Remember to do this part before putting together your snowflake ornamnent. Use a dot marker or acrylic paint to colour your craft sticks and let them dry.

Once dry assemble your snowflakes using the instruction above on how to make snowflake with popsicle stick.Now it is time to decorate.

Snowflake ornaments with pipe cleaners.

Grab one of the snowflakes assemble and wrap pipe cleaners around all six sides.

Snowflake Ornament with Paper Straws

Using a scissors, cut into tiny bits and glue on to the snowflake ornament. Glue stick or pva glue adheres the paper straw easily.

You may also decorate your popsicle stick ornaments with sparky adhesive stones. No glue needed.

Popsicle Stick Ornaments with Buttons

Use glue stick to decorate with different coloured buttons

Popsicle Stick Ornaments with Beans

And finally you can try grains corns and kind of beans. Uncooked of course. Pvc glue works a treat. Just let it dry thoroughly

Here are some Kids Christmas Crafts You May Like


  • 3d Paper Snowflake


  • Toilet Roll Christmas Tree


  • Folded paper christmas tree


  • Paper Plate Christmas Wreath


  • Christmas pop up card


Printable Christmas Tree Accessories

Printable Christmas Tree Accessories

Decorate the Christmas tree with the kids with printable Christmas tree ornaments. There are many options to hang on the christmas tree including Santa Claus, reindeer, christmas bells, candy cane and more

There is more than enough to keep the kids busy. You will need to print, cut, colour, paint, decorate and finally hang your printable paper christmas ornaments on the Christmas tree.

Materials you will need 

  • A4 white card stock paper
  • Hole punch
  • Glue stick
  • Crayon/Marker/Colour pencils
  • Glitter glue
  • Scissors
  • Craft stones, buttons, Ribbons, Mini Pom poms  (anything to decorate your ornaments with)

To Make Your Paper Christmas Ornaments

Print out the free paper christmas ornaments .

Santa claus

Reindeer

Baubles

Stars

Bells

Bows

Candy cane

Using a pair of scissors, cut out the ornaments from the templates.

Colour in christmas ornaments using either markers, crayons or coloured pencils.

Paint on the coloured ornaments with glitter glue of the same colour.

Then decorate your ornaments with buttons, ribbons, craft stones etc

Have fun using craft stones to decorate your paper christmas tree stars. Use craft stones of different colours and sizes

Not forgetting your printable christmas tree baubles.

Bear Heart Card Craft

Looking for a cool Father’s Day craft idea for this Father’s Day? This Papa Bear Heart Card would be a perfect craft for kids to give to Dad. 

This Heart Bear Card Craft is also suitable as Valentines Day Craft or Mother’s Day Craft for kids.

The Bear Craft Template has all that is need to make this craft which includes the heart template and bear parts.

Kids will have fun cutting out and assembling the small Bear and big Bear.

Related Father’s Day Crafts You May Like to Try

Cool Dad Father’s Day Card

Printable Dad Glasses.

You will need three different coloured card stock paper.

The 3 page printable template includes heart shape, the face and outer ear, and the inner ear, eyes, nose and bow tie.

There is a lot of cutting involved so younger kids may need supervision.

Once all the cutting is done, assemble the bears on the heart card with glue.

Materials Needed to Make a Bear Heart Craft Card

Steps to Make a Bear Heart Craft Card

Print out the templates on each coloured cardstock paper.

Use dark coloured paper for the template with the face (the ones with oval shapes) while the light coloured ones for the other parts of the bear.

Cut out every piece of the template with glue stick in tow.

The heart shape and all the pieces on the template

Some of the pieces can be tricky but it’s fine as long they have fun making it.

Start by glueing the smaller ear pieces to the bigger ones. Then glue them on both sides of the face.

Glue the eyes, nose and cheek pieces as shown in the picture.

Use a marker to define the nose by drawing a circle and two slants underneath

Repeat the same process to make the smaller bear.

Glue your Bears to the heart card. Leave some space to write a message  on the card.

Then glue the bow ties to both bears.

You could opt to make just one bear. This will give more space to write messages for further decorate as you please.

Happy crafting.

Download bear heart template

Cool Dad Card

This cool dad Father’s Day card is a simple and creative Father’s Day crafts for kids to make at home for dad or as a father’s crafts at school.

This is a very easy Father’s Day card craft that children will have fun making and of course Dads will love to receive as it shows Dad as very cool.

This comes with a free printable template you can print, cut out and use to  create your handmade Father’s Day card.

To make cool, I have given him a fashionable hat, eye glasses, moustache and a bow tie.

And of course, arms and legs to complete the look.

This craft cool dad Father’s Day card should put the children cutting skills to the test.

Once all the accessories have been cut, simply glue them on the card.

Another cool craft Dad will like is this Printable Dad Glasses. You can make one for him and one for you.

But if you rather stick to cards, this Heart Bear Card Craft fits the bill.

Cool Dad Father’s Day Card

Materials you will need for your handmade card are as follows

2 Card stock paper (different colours)

Scissors

Glue stick

Printable Template (download below)

Instructions 

Print out the template

You can print on white card stock paper if you want to colour the accessories

Carefully cut out all the accessories on in the template.

Younger kids may need supervision when handling scissors.

Lay the second cardstock paper in landscape.

Fold it in half right down the middle.

Start gluing the accessories. Glue the hat, glasses, the moustache and the bow tie in the middle of the page.

You may want to leave space to write a message at the top and the bottom .

Glue the arms to back of the card.

Glue the legs on the inside of the card. The left side of the card when opened.

This is to enable the legs to be folded to give the illusion of sitting down.

Fold the legs

Done. Your Handmade Cool Dad Father’s Day Card is finished.

Don’t forget to rite your Father’s Day message on your card before presenting it to Dad.

Download the template

Printable Dad Glasses

Make these printable dad glasses for Father’s Day. A wacky Father’s Day crafts for kids aged 6 and above.

Make Dad feel special on father’s day with these Father’s Day glasses.

As Father’s Day crafts for kids go, this is very easy to make. Once the template is printed, all you need to do is cut it out and glue the handles on.

Get creative and decorate the glasses with whatever you have. Just remember to make it fun. I have used cut pipe cleaners, mini Pom poms.

The paper glasses template come in a small and large size measuring 15cm and 12cm in width.

You print the template on coloured paper or plain white paper if you want to do some colouring

To Make Paper Sunglasses For Father’s Day

You will need the following materials

  • Card stock paper
  • Printable template (Download below)
  • Scissors
  • Craft knife
  • Glue stick
  • Glue gun
  • Crayons, markers (optional)
  • Mini Pom poms, pipe cleaners (optional)

Print the Dad Glasses template on coloured card stock paper.

Use white card stock paper if you want to do some colouring.

Cut out the template including the handles.

Use a craft knife to cut along the lines as pictured.

Cutting complete.

Decorate as you please. If using pipe cleaners, cut into small pieces and stick on with a glue gun

Decorate the handles as well

You can glue on Pom poms

Fold along the dotted lines on the handles

Using the glue stick, glue the handles to the frame.

Another fun Father’s Day craft you could try is this super Cool Dad Father’s Day Card.

Download Printable Glass Template

Flower Photo Card

Photo paper flower crafts are cute and colourful photo crafts or flower crafts. They are ideal as greeting cards for kids to make for a special occasion like Mother’s Day . It is a wonderful option to make at home or school as a Mother’s Day flower card craft

If you are looking for more Mother’s Day crafts ideas, our Mother’s Day flower heart card is our most popular Mother’s Day craft. It is a heart shaped card held my a paper straw which opens up and collapses with an inside message.

You will also like our flower card on a popsicle stick.

This flower photo craft  is an easy and fun paper craft  and does not need fancy materials. All you will need to make this flower photo card are different coloured paper, scissors and glue.

It involves a fair bit of paper cutting which is good for developing fine motor skills of the children. It also involves meticulously arranging the paper strips which help develop focus and attention to detail.

When the flower craft is finished, you can encourage the kids to write their heartfelt message on the inside of the flower card. The standard “I love mom” or “Happy Mother’s Day” will do.

You can also encourage or guide them to go even further and express their sentiment in any way they want. There is no right or wrong way to say”Thank you” or “I love you to” to mums.

And what’s not to love about this flower craft, it is a three in one keepsake. It is photo frame, greeting card and a flower

How to Make a Photo Flower Card

Materials needed

  • Card Stock paper
  • 2 different coloured paper
  • Glue Stick
  • Scissors or Paper cutter
  • Photo (to put in the centre of the flower)
  • Printable template below (optional, you can make one without the template just follow the instructions below)

Instructions 

Cut out two 10cm circles, two leaf shapes 7cm long and a small rectangle 2cm by 5cm

Use the card stock paper to cut these out. The small rectangle piece is to be used to join the two parts of the card.

Now, cut out strips form the two different coloured paper. Cut out strips 1.5cm by 15cm from one and from the other cut out 1cm by 15cm.

For a flower craft this size, 32 strips will be needed so 16 strips of each colour

Take a strip rub a bit of glue and stick together to form a loop. Repeat until all the strips have been looped.

If not using the template, take one of the paper circles and use a pencil to draw a circle 7cm in diameter. This is where the photo goes.

Start glueing the paper strips to the edge of the circle neatly. Glue the 1.5cm strips first. Then glue on the different coloured (1cm wide strips)

Finished gluing the strips together? Glue the photo to the centre of the flower. The photo should be 7cm in diameter.

Take the other card, glue the two leaves at the back and thenwrite your message on the front.

To join both the two parts of the card together, take the small rectangle and fold in half and glue it to both parts of the card. This acts as a hinge so it allows the card to open and close.

All done.

If looking for more easy Mother’s Day crafts to make at school or at home, you can get the kids busy with these set of Mother’s Day colouring pages 

Big Mouth Fish Surprise

This Big Mouth Fish Surprise is a fun paper craft and colouring activity that is sure to fascinate your little ones.

Print out the Big Mouth Fish Surprise template, fold the upper part of the print out as described below and the kids will have loads of fun revealing the surprise in the mouth of the fish.

This printable template is great for use at home with the kids or in a preschool or kindergarten setting. There is no paper cutting or glueing required. No mess to be cleaned up.

This fish craft is also ideal as art and crafts projects, summer crafts for kids or any fish themed crafts.

There are two plain templates the kids can colour in as well as two coloured templates.

This big fish surprise reveals a big fish chasing a smaller fish or jellyfish.

The kids can be as creative as they want with this. They can draw in their own animal or even write a message of their own choosing instead of a drawing.

Here are the materials needed

  • Big mouth fish surprise printable template (Get it below)
  • Big fish surprise printable template (Get a free version at the end of this tutorial or get all 4 from our membership site)
  • Markers, coloured pencils or crayons
  • Cardstock paper (They are heavier and would work better but you may use regular paper as well)

How to make your Big Mouth Fish Surprise

Print out any of the templates. The one with or without an animal in the mouth. You can also choose not to use a template and draw your own fish using the images on here as a guide.

Colour in your fish. If using the plain version of this fish craft template, colour in the big fish, little fish, bubbles and sea floor scenery.

You may use markers, crayons or coloured pencils. Markers are perfect for heavier paper, while crayons and coloured pencil are well suited to regular paper.

Colouring done.

Fold along the line shown in the template. It is the upper jaw of the fish. Make sure it is folded in a clean straight line.

Now bring the clean fold you made to the lower jaw of the fish and press down to create another fold.

Done! The Big Mouth Fish Surprise printable will definitely thrill and fascinate the kids as it opens and closes to reveal a little surprise.

Get the template 

big-mouth-fish-nothing-in-jaw-plain

big-mouth-fish-plain

big-mouth-fish-nothing-in-jaw-coloured

big-mouth-fish-coloured

Ancient Egyptian Headpiece

Have fun making this ancient Egyptian headpiece with printable templates. Simple paper craft for kids to make for costumes or just for fun.

You can be a an Egyptian royal for the by creating your own Egyptian headpiece. Simply print, colour, cut and staple the pieces together.

You can print the coloured version and make your headpiece. It has eye catching set of colours and design as pictured.

You can also get the kids to create their own version by printing the plain version.

They will have fun being creative and probably using all the crayons in the box as there is a lot to colour with the plain headpiece.

How to make your Egyptian Headpiece

To assemble your Egyptian headpiece, you will need

  • A4 sized cardstock paper
  • Crayons or Marker
  • Scissors
  • Glue or Stapler
  • Printable template (Coloured or plain)

How To Make Your Own Paper Egyptian Headpiece

Print out the template on A4 cardstock paper. Make sure it is paper that is this enough to hold shape. Normal printing paper is not suitable. Use paper that is at least 140 gsm and up to 200 gsm.

If you are using the plain version version, now is the time to colour it in.

With the colouring done, now cut out the head piece along the lines

Now using a stapler or glue, stick together either side, the two strips without the cobra head.

Make sure the strips are aligned before gluing them together.

Then estimate the size of the hat so it sits comfortably on the head of the wearer.

Adjust the size by putting the two strips together forming circle.

Then staple or glue to complete your Egyptian headband

Download template

Egyptian headpiece (plain)

Egyptian headpiece (pre-coloured)


Have fun crafting

Easter Bunny Card

Put a smile on someone’s face with this simple printable easter bunny card. This cute easter greeting card is a very easy to make Easter craft for kids.

Even better, it comes with a free template. Simply print out this easter bunny card template, cut it out and your message. This is a perfect token kids can give to their friends and family members during Easter.

It is really simple and straightforward making this easter bunny card. This free printable easter bunny card template allows you to simply print out, cut out and simply write your easter message on your card.

This is great for preschool age kids and above as long as they can hold a pair of scissors for cutting. The younger kids may need some supervision and it is ok if the cut isn’t clean. It is all part of the fun.

After cutting, all that is needed is to fold the card and then decorate. Give the children free will to decorate however they like with whatever they want.

The kids can keep it clean as pictured or use markers or crayons, glue pom poms, paper pieces etc

How to Make Easter Bunny Card

To make your card with the easter bunny card template, you will need the following

White A4 paper

Easter bunny card template (below)

Scissors

Crayon or marker (optional)


Print out the easter bunny card template.

The coloured or plain version.

If using the plain version, the kids can have fun colouring in the easter bunny on the outside and the Easter egg basket inside the card.

Cut out the template along the thin lines and the bunny faces on each side.

Fold the bunny faces back on either side in line with the edge.

Turn it over and fold each side in half to meet in the middle.


Go ahead and decorate your easter bunny card as you please. Write your Easter greeting on either side of the inside of the card.

Easter bunny card templates

easter bunny card plain

easter bunny card coloured

Have fun crafting.

Silly Monsters Corner Bookmarks

If you are wondering how to make corner bookmarks with plain paper, look no further.  This is a simple and functional craft for kids to make and use to section off the current book they are reading.

Since reading isn’t season, I am sure kids will love making these fun and colourful silly monsters corner bookmarks which comes with a printable template.

This is a very easy to make kids craft and also one that is also practical.


You can make sure to stop and continue reading your books at a later date on the the right page. Plus they are fun and colourful with added benefit of beautifying the page.

There are four little monsters to choose from with very easy assembling instructions. All you need to make your corner bookmarks are paper, scissors and glue stick.

If you are looking for different corner bookmark ideas, check out this times table bookmark.  You can use as a bookmark as well as a times table aid to help memorise the times tables


How to Make Corner Bookmarks With Template

Materials you will need

Instructions 

Download and print our template.

Carefully cut out the bookmark designs along the outer edges

Then cut along the thick line to the middle.

Make sure you only cut the thick line highlighted by scissors symbol.

Do not cut along the dashed lines


Fold along the dotted lines.

Fold the no 1 triangle backwards behind no 2.


Fold triangle no 2 backwards.

Apply glue to triangle no 3 and then glue to triangle no 4.

Glue properly and make sure it sticks firmly

All done. Now you can use any of the silly monsters bookmarks that takes your fancy.

Get Silly Monsters Bookmark Template here


Easter Bunny Cutting Skills Activity

The kids will definitely have fun assembling this bunny cutting skill activity.

They get to develop fine motor skills through the scissors cutting motion while also having fun.

Perfect easter craft activity for the home or school.

They will enjoy the creative process involved which includes colouring, cutting, gluing and assembling the easter bunny on the page.

This activity involves cutting out the individual pieces of the bunny from the template and assembling them to form a complete picture of the bunny .

To put this activity together, you will need the following supplies

Print out the templates and cut out the pieces.

If using the black and white version, remember to have the kids colour in the bunny rabbit.

Using the glue, start to assemble the bunny to fit the picture

Glue in the ears first, then comes the head (the smaller circle)

Stick on the eyes, nose and whiskers.

Then stick on the bigger circle  and feet


More easter themed crafts

Easter chick card. Easy chick pop up card that kids will enjoy making

Easter word games. Enjoy free printable easter themed word search and puzzles


Easter Chick Card

Here is another pop up handmade card the kids will love. This Easter Chick card is one many easter craft ideas the children will be thrilled to make.

This 3d easter chick card is easy to make and can be assembled with or without a printable template.

Make a gorgeous pop-up chick card – as you open the card his little beak will open and then close again as it is shut.

This is an ideal easter craft for kids albeit the fairly older ones as this involves cutting out the parts of the card from the template. For the preschool age kids, you might have to do the cutting and then let them glue and decorate the card.

[the_ad_placement id=”paragraph-2″]

Some easter craft ideas you might like…

3d egg card

Paper chick craft

How to make a pop up Easter Chick Card

You will need the following

Yellow paper

White paper

Any other coloured paper

Scissors

Glue stick

Template (optional) 


If using the template, print out the circles on the yellow paper and the parts of the chick on the white paper.

Cut out each individual parts.

You will need 6 circles so fold the yellow paper in half making sure the printed side is on the outside. Then cut out the circles. Folding it saves you the time as you would only cut three times instead of six.

[the_ad_placement id=”paragraph-3″]

If you are not using the template,

Find a round object measuring 8cm in diameter, draw 3 circles on the 1st half of the yellow paper. Fold in half and the cut out the circles.

Cut out zig zag on measuring 3cm in height and 21cm in width.

Cut 2 L shapes for the feet and a triangle shape for the beak on an orange coloured paper. Cut 2 wings on a yellow paper.

Fold the six circle in half

Ready to assemble your easter chick card

[the_ad_placement id=”paragraph-4″]

Take the A4 coloured paper of your choice and fold in half so that it measures 21cm by 14.85cm.

Then fold in half  from left to right as pictured.

Glue the green grass to the bottom of the page

Start assembling the chick by gluing two folded circles to the card. One to the left and the other to the right.

[the_ad_placement id=”paragraph-5″]

Then glue the rest on top of each other.

Glue the wings, legs, eyes, and beak. feel free to decorate the inside of the card as you please.

Finished.. Your Easter chick card is complete.

[the_ad_placement id=”paragraph-6″]


Flower Card Craft

Why not make this simple flower card craft. This flower card is easy for kids to make using a flower card printable template.If you are looking a cute flower craft or a simple Mother’s Day craft card idea? Well look no further. Take a look at this Mother’s Day hearts card.  

This card is cut out from a printable template and glued on to a popsicle stick with a message written on the inside of the card.

This flower paper craft involves a fair bit of paper cutting which improves hand eye coordination and fine motor skills.

The kids can also express their creativity by colouring the card anyway they want.

This popsicle stick flower craft is great a Mother’s Day craft for kids, Easter crafts as well as a valentines day craft for kids.

To make your flower card, you will need the following supplies.


Materials needed

White A4 cardstock paper to print template

Flower card template (Download free below)

Glue stick

Popsicle stick

Markers or crayons

Scissors

How to make a Flower Card

Start by printing the flower card template.

If you are using the non coloured version, now is the time to get creative by colouring using a markers or crayons.

Make sure to use bright colours to make your finished card pop.

Colour the leaves that will be glued to the popsicle stick as well.

Once you are done colouring, cut out the template using a pair of scissors. Careful not to rush cutting the round edges.

Cut out the small leaves and flowers too

Finshed cutting? Now fold the flowers in half along the dotted line.

Write your message on the inside and the outside.

You may choose to only write your message inside the card and just decorate the outside.

It is up to you.

Take the popsicle stick, add glue to the top and stick it to the back of the flower card.

Make sure it is glued to the back such that you can open and close the card the right way.

Glue the leaves to the popsicle stick

Download templates

Plain

Coloured


For more card making ideas, check out Card making ideas for kids

Happy crafting.

Mother’s Day Hearts Card

If looking for a mother’s day craft idea, you can make this adorable Mother’s Day card that is glued to a piece of straw and collapses into a heart.  

This simple Mother’s Day card can also be a valentines day craft too. Check out this Valentines git box card

Using the free printable, all you need to make this craft is paper cutting and gluing.

Print and cut out the template, glue plain (coloured paper) in the middle and fold in to hearts.

Cut out shapes and decorate how you want.

Materials needed for Mother’s day card include


You will also like these Mother’s Day crafts 

Flower photo card

Mother’s Day Colouring Pages

Flower Card Popsicle Craft


How to make Mother’s Day Heart Card


Download and print the card template. Download here


Cut out the template

Cut out a circle 10cm in diameter. Write the message on it.

Then apply glue using the glue stick. Firmly place it in the middle.

Fold the template along the dotted lines.

Once folded, it should be collapsible as shown in the video above.

Apple 3 glue dots to the heart

Glue on the straw.

Then decorate with paper shapes. If you have paper shape cutter, cut out different shapes and get creative and decorating as you please.

Remember to use different colours. Use craft gems to add some sparkle.

You can also glue paper shapes to the straw

Decorate the inside of your mother’s day heart card

Using the hole punch, punch a hole on the side of the heart.

To hold the heart in place, insert a ribbon and tie it in place.

Another option is to use a mini clothes peg, colour it or glue on paper shapes on it. Then use it to hold the mother’s heart day card into place.

Happy crafting

Download the free template here

More Mother's Day Activities

Exit mobile version